
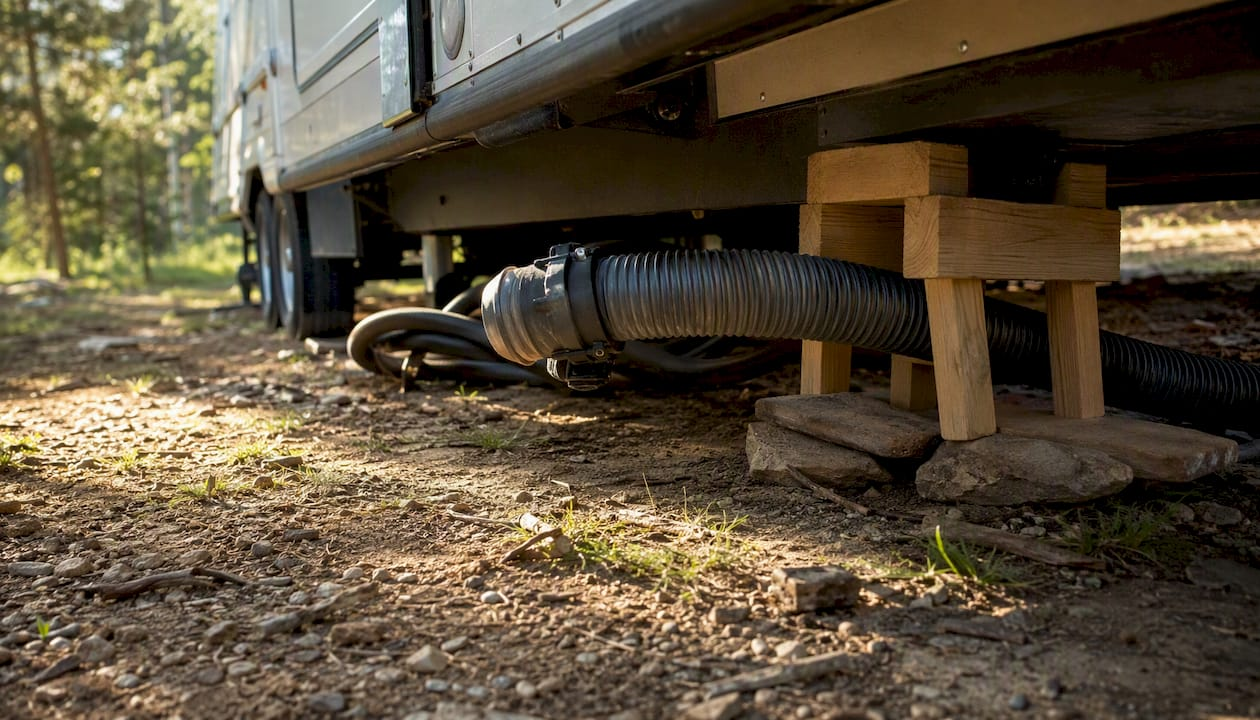
If your cradle or slinky-style sewer support isn’t draining, the fix is almost always the same: re-establish continuous downhill grade, eliminate any local sag or dip, and keep the hose supported along its entire run instead of just at a few points. A support that surrounds and stabilizes the hose along its length, sometimes called a cradle in sewer engineering, only works when it holds that grade from your RV’s outlet to the campsite connection. Miss that, and you get slow drains, standing water in the hose, and eventually a mess you didn’t sign up for.
Here’s what to do right now:
- Check the hose path end to end for dips where waste can pool.
- Raise or shorten the run so it follows the most direct downhill line to the connection.
- Slide blocks, wood scraps, or rocks under sagging sections to remove low spots.
- Open the black tank valve slowly and watch the flow before dumping gray water.
For a longer-term fix, a tension-line system like the RV Levitator sewer hose support holds the hose above grade instead of resting it in a sagging cradle. If you ever get standing sewage or a backup at the connection, stop, protect anyone nearby from exposure, and follow basic sewer backup safety steps before continuing.
Key Takeaways
Cradle and slinky sewer support failures almost always trace back to lost grade, whether from sagging segments, uneven terrain, or narrow saddle contact, and fixing the grade fixes the drainage.
| Point | Details |
|---|---|
| Grade is everything | Restore a continuous downhill slope from RV outlet to connection before adjusting anything else. |
| Diagnose before fixing | Use a level or water test to confirm a support dip, not a clog, is the real cause. |
| Hybrid setups win | Combining a rigid channel with a flexible support outperforms either method alone on rough sites. |
| Replace worn connectors early | Brittle, UV-damaged plastic connectors are a leading cause of repeat mid-drain separation. |
| Consider a tension-line upgrade | RV Levitator suspends the hose above the terrain, removing the ground-contour problems cradle supports can’t solve. |
Table of Contents
- Why Do Cradle-Style Sewer Supports Fail?
- How Do You Know the Support Is Causing the Drainage Problem?
- Quick Campsite Fixes for Sagging or Kinked Supports
- How to Set Up a Cradle Support the Right Way
- When Should You Repair vs. Replace Your Sewer Support?
- Why Tension-Line Support Solves What Cradles Can’t
- Maintenance Habits That Prevent Cradle Support Failures
- Sources
Why Do Cradle-Style Sewer Supports Fail?
Cradle and slinky supports fail for pretty predictable reasons, and once you know them, you’ll spot the warning signs before you get a mess on your hands.

The most common failure mode is sag between segments. Slinky-style supports flex at each joint, and if the ground underneath dips even an inch, that segment drops low enough to trap waste. Connector separation is another big one. Those accordion-style sections snap or clip together, and repeated setup and breakdown loosens the fit until one section pops free mid-drain. You’ll also see hoses slip right off narrow half-pipe saddles, especially on any kind of side slope.
Several factors make this worse:
- Terrain slope: sites that lean sideways rather than straight downhill twist the hose off its cradle.
- Soil type: soft or sandy ground lets support feet sink unevenly over a weekend.
- Ground obstacles: roots, rocks, and tire ruts create sudden height changes a rigid cradle can’t absorb.
- Hookup height: if the sewer connection sits higher than your RV’s outlet, no support arrangement fixes that without extra elevation.
Design plays a role too. Engineering guidance on pipe supports recommends a saddle angle between roughly 90 and 120 degrees for stable contact, and consumer-grade cradles with narrow, shallow saddles fall well short of that. Add UV-brittle plastic that cracks after a season in the sun, and you’ve got a support built to fail on the exact ground where you actually camp. If you want to see how these mistakes stack up in real setups, our breakdown of common RV sewer support mistakes covers the patterns we see most often.
How Do You Know the Support Is Causing the Drainage Problem?
Not every slow drain is a support issue. Sometimes it’s a clog, a stuck valve, or a hose that’s just too small for the job. Here’s how to isolate the real cause before you start adjusting anything.
Watch for these symptoms first:
- Water drains fine at the start, then slows or stalls partway through.
- You can see or feel a bulge of standing waste in the hose at a low point.
- The same connector keeps popping loose no matter how many times you reseat it.
Then run a quick three-step check:
- Test the slope. Lay a level along the hose, or pour a cup of water at the RV end and watch where it stalls.
- Watch the flow live. Have someone empty the gray tank while you observe the hose for backup or pooling at joints.
- Trace the physical path. Walk the full hose run and look for dips, twists, or spots where it’s pinched against a rock or wheel.
If the water stalls at a visible low point and the hose shows a kink or sag there, that’s a support problem, not a clog. If flow just crawls the entire length with no obvious dip, check the tank valve and hose diameter before you touch the supports.
Quick Campsite Fixes for Sagging or Kinked Supports
You don’t need a toolbox to fix most of these problems on the spot. Here’s what actually works when you’re standing at a bad site with waste backing up.
Shorten and redirect the run first. The shortest, straightest downhill path almost always beats a longer hose snaked around obstacles. If your current hose forces a zigzag to reach the connection, see if repositioning the RV or using a shorter length solves the sag before you build anything.
Build a temporary ramp for dead spots. Stack flat rocks, scrap wood, or leveling blocks under any section that’s sitting lower than the rest. Even a two-inch lift at one dip can restore flow across the whole run.
Try a hybrid channel setup. Campers who combine a gutter section or cut PVC half-tray with an expanding slinky support often get a more even angle than the slinky alone provides. Lay the rigid channel under the worst dip, nest the hose into it, and let the slinky handle the rest of the run.

Secure everything before you drain. Use tent stakes, bungee cords, or zip ties to anchor the hose and channel in place so a gust or a curious raccoon doesn’t undo your fix mid-dump.
Follow these safety basics while you work:
- Never stand directly over an open connector while tank valves are open.
- Open the black tank valve first, in short bursts, so gray water doesn’t overwhelm a marginal setup.
- Wear disposable gloves, and wash up thoroughly afterward.
- If sewage backs up at the connection itself rather than in your hose, stop and call the campground or a plumber rather than pushing more waste through.
Pro Tip: Keep two or three concrete pavers in your gear bay year-round. They’re cheap, they stack for height, and they don’t degrade in the sun the way foam blocks do after a season of trips.
How to Set Up a Cradle Support the Right Way
Most cradle failures trace back to setup, not the equipment itself. Get these basics right and you’ll cut your problems dramatically.
Start with grade. Aim for a steady, unbroken downhill slope from your RV’s outlet to the sewer connection. There’s no need for a laser level. Just crouch down and sight along the hose. If you can see any point where it looks flat or tips upward, that’s where waste will collect.
Space your saddles or cradle sections to follow the hose’s natural curve rather than forcing it straight. Leaving a gap between supports lets the hose belly down into a mini-dip, undoing the grade you just built. As a rule of thumb, no unsupported gap should be wider than the sag you’re willing to tolerate, which for most flexible RV hoses means keeping supports close enough that the hose never visibly droops between them.
Handle connectors carefully:
- Seat each joint fully and give it a slight twist to lock it, rather than just pushing it straight.
- Recheck connectors after the first few gallons drain, since vibration from flow can loosen a marginal fit.
- For low-clearance rigs, adjust support height at the RV end first, then work backward toward the connection.
Pro Tip: A hybrid setup, rigid channel near the RV where the drop is steepest, then a flexible slinky or tension-line support for the rest of the run, consistently outperforms a single-method setup on uneven sites. Full step-by-step instructions live in our setup guide if you want a walkthrough before your next trip.
When Should You Repair vs. Replace Your Sewer Support?
If you’re re-adjusting your cradle support every single stop, that’s a signal, not bad luck. Run through this before you spend another weekend fighting the same problem.
Ask yourself:
- How often does this happen? Occasional issues on genuinely bad sites are normal. Weekly failures on flat ground are not.
- What kind of campsites do you typically book? Frequent gravel, sloped, or unimproved sites punish rigid cradle designs far more than paved RV parks.
- How old and worn is your current hose and support kit? Cracked plastic connectors and stiff, sun-baked hose sections rarely hold a seal reliably.
- Do you need something that packs down small, or is storage space not a concern?
If repeated failures trace to connector wear, replacing just the worn segments can buy you another season. But if the core problem is that a rigid cradle simply can’t hold grade on the terrain you camp on, an upgrade solves more than a repair ever will. Heavier-duty cradles add rigidity but also weight and bulk. Covered channel systems fix the sag problem but take up more storage room. Tension-line systems, which suspend the hose from a line rather than resting it in a cradle, sidestep the ground-contour problem entirely.
On materials, standard PVC-style connectors are cheap but brittle after UV exposure, while reinforced plastics and UV-treated vinyl sleeves hold up over multiple seasons. Concrete encasements exist in municipal sewer design for specific bedding upgrades on existing pipelines, but that’s a fixed-infrastructure solution, not something relevant to a portable RV setup. For campers weighing this decision, our comparison of sewer hose support versus no support at all is worth a look before you buy anything.
Why Tension-Line Support Solves What Cradles Can’t
The root problem with any cradle or slinky system is that it depends on the ground being cooperative. Ground it rarely is. Tension-line support removes that dependency by suspending the hose from a line above the terrain instead of resting it in contact with every rock, rut, and low spot along the way.
That single design change addresses the failure modes we’ve covered here almost directly. A suspended hose holds a continuous downhill grade because you set the grade at the anchor points, not at the mercy of whatever the ground happens to do. There’s no ground contact to abrade the hose material, no dip for waste to pool in, and no connector joint sagging under its own weight between supports.
Field observations from RV owners using tension-line setups consistently show fewer mid-run dips and more even flow across uneven sites compared to ground-resting cradle or slinky supports, particularly on gravel and sloped campsites where rigid supports struggle most.
RV Levitator’s version pairs that tension-line approach with UV-resistant vinyl sleeves that protect the hose from sun and abrasion, and it’s built for universal hose compatibility so it fits the setup you already own. Benefits worth noting:
- Consistent downhill slope regardless of ground contour.
- No direct ground contact, which limits abrasion and UV wear on the hose itself.
- Quick installation across gravel, grass, or uneven gravel pads.
The company backs it with a money-back guarantee, which tells you something about how confident they are it holds up outside a showroom. Setup instructions are laid out in detail if you want to see exactly how the anchor points and tension line go together before your next trip.
Maintenance Habits That Prevent Cradle Support Failures
A little routine maintenance keeps any support system, cradle or tension-line, working the way it should for years instead of months.
Check these every few trips:
- Inspect connectors for cracks or brittleness, especially after a hot summer season.
- Flex the hose material gently and look for stress lines that suggest UV damage.
- Clear leaves, dirt, and debris out of any channel or cradle track before each use.
- Confirm stakes and tension anchor points are still holding firm tension, not just loosely in place.
Between trips, storage matters as much as setup:
- Collapse and sleeve hoses fully before packing them away to avoid kinks setting in.
- Store supports somewhere dry and out of direct sun when possible. UV exposure is the single biggest killer of plastic connectors.
- Swap out any segment that’s gone stiff or cracked rather than hoping it holds one more season.
Come winter, drain and dry everything fully before long-term storage, and plan on replacing plastic connectors every couple of seasons even if they look fine. Our guide to RV accessory maintenance on uneven terrain walks through a fuller seasonal routine if you want to build this into your regular RV checklist.
A Field Note on Why This Guide Reflects Real Setups
This guide comes out of watching RV owners wrestle with the same sagging cradles and popped connectors at campground after campground, from gravel pull-throughs to sloped state park sites. The patterns repeat: a support that worked fine on a level driveway falls apart the first time the ground isn’t flat. That’s the gap RV Levitator was built to close, and it’s the lens this whole troubleshooting guide is written through.
Levitator: A Tension-Line Upgrade for Repeat Cradle Problems
If you’ve read this far because your cradle or slinky support keeps failing on the same three campsites, a ground-resting system probably isn’t going to stop doing that. A tension-line setup skips the ground contour problem entirely by holding the hose above it, which is exactly where most cradle failures start.

The RV Levitator sewer hose support is built specifically for uneven, gravel, and sloped campsites, the exact conditions where cradle and slinky supports sag, kink, and pop loose. It includes UV-resistant vinyl sleeves to protect the hose itself, works with the hose you already own, and installs in minutes without special tools. Backed by a money-back guarantee, it’s a straightforward next step if you’re tired of rebuilding a ramp out of rocks every time you park on a slope. Check the uneven ground support page to see if it fits your setup before your next trip.
Sources
- Cradle — NASTT glossary
- Design of Ductile Iron Pipe on Supports — DIPRA
- WSSC design manual C-13 — Concrete encasement, arches and cradles
- How to Support the Stinky Slinky — RV Reviews and Accessories
- Troubleshooting Your Sewer Problem — Seattle Public Utilities
Leave a Reply