
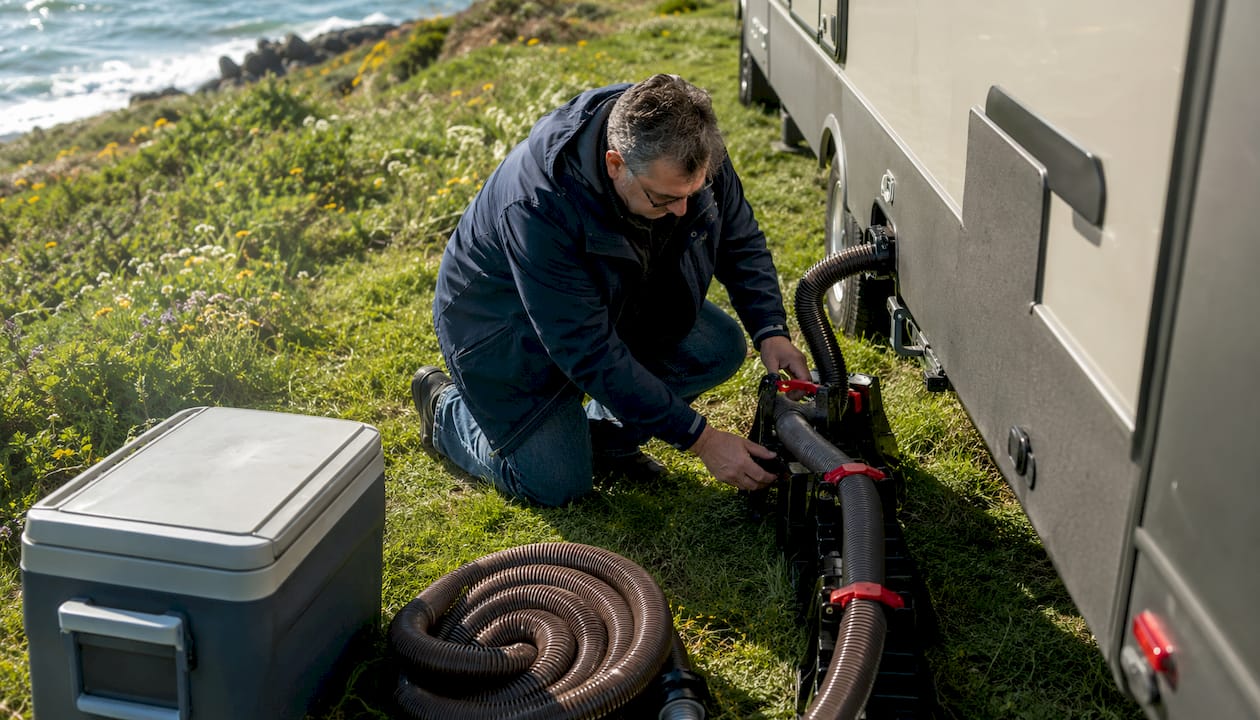
Interval-based checks, load-path inspections, and correct lubrication prevent most sewer-hose drainage failures on uneven ground. If you’re dealing with an active drainage problem right now, reposition your hose supports to restore a consistent downhill slope and check every coupling for a tight seal before running water. For your quick pre-departure reference:
- Before every trip: Inspect hose condition, clamp tightness, and support positioning for grade.
- Monthly: Check fasteners on support brackets and look for fretting dust or cracking near joints.
- Seasonally: Lubricate moving parts, flush and sanitize hoses, and inspect UV wear on all materials.
- Annually: Perform a full load-path inspection, replace worn supports, and log all findings.
Good RV hose maintenance habits start with knowing your schedule and sticking to it.
Table of Contents
- What should you check and when for sewer hose supports?
- How do you inspect sewer hose supports on uneven terrain?
- What lubricants should you use and how often?
- How do you prepare hoses and supports for seasonal storage?
- How should you prioritize maintenance tasks by risk?
- How do you troubleshoot drainage problems on uneven terrain?
- When should you repair versus replace hoses and supports?
- Rvlevitator makes sewer hose support easier on any terrain
- Key Takeaways
- Maintenance habits are what actually protect your rig
What should you check and when for sewer hose supports?
Industry guidance organizes RV maintenance into four intervals, and sewer-hose support care fits neatly into that same structure. Here’s how to apply it:
| Interval | What to Check |
|---|---|
| Before every trip | Hose cracks, coupling seals, clamp torque, support grade/slope |
| Monthly | Fastener tightness, bracket condition, fretting dust at joints |
| Seasonally | UV wear, hose flush and sanitize, seal condition, storage prep |
| Annually | Full load-path inspection, replace worn supports, log all findings |

The Lippert maintenance checklist reinforces this cadence: seals, fasteners, suspension mounts, and underbody lines all need repeatable inspection at each interval.
Pre-trip quick run:
- Visually scan the full hose length for cracks, soft spots, or discoloration.
- Confirm every coupling is fully seated and locked.
- Set support height so the hose slopes consistently toward the dump station inlet.
- Tug each bracket to confirm it hasn’t loosened since your last trip.
Seasonal tasks:
- Flush black and gray tanks completely, then rinse the hose with clean water.
- Inspect all hose surfaces for UV brittleness, especially at fold lines.
- Dry supports and hose sections thoroughly before storage.
How do you inspect sewer hose supports on uneven terrain?
Uneven ground concentrates stress at joints and fasteners rather than distributing it evenly along the hose. Caliber Technologies notes that vibration-induced failures are common when accessories lack engineered secondary mounts, and the load path — the route forces travel from the hose through the support into the ground — is where you need to focus.
Inspection checklist:
- Check bracket condition: look for cracks, bent arms, or elongated bolt holes.
- Verify fastener torque at every attachment point; hand-tight is not enough.
- Inspect welds or crimped joints for fretting dust (a fine metallic or rust-colored powder that signals micro-movement).
- Confirm attachment geometry keeps the hose at a consistent downward grade.
- Check spacing between supports: gaps wider than manufacturer spec allow sag that strains couplings.
Common problems and fixes:
- Loosened brackets: re-torque fasteners and add a lock washer if the hole shows wear.
- Elongated bolt holes: the bracket has shifted repeatedly; reinforce with a backing plate or replace the bracket.
- Fretting dust at joints: clean the area, apply anti-seize to the fastener thread, and re-torque.
Pro Tip: Check for modal-resonance risk by tapping each mounted bracket while the rig is stationary. A bracket that rings or buzzes at a low frequency is vibrating in sync with road inputs. Add an isolation pad or rubber grommet between the bracket and its mount to break that resonance before it cracks the joint.
Also review common sewer support mistakes before your next trip to catch issues you might overlook.

What lubricants should you use and how often?
Lubrication every 3–6 months extends component life and keeps moving parts from seizing. The frequency depends on how often you travel: full-timers should lean toward the 3-month end; occasional campers can stretch to 6 months.
Use the right lubricant family for each application:
- Silicone spray: best for awning arms, slide-out seals, and rubber gaskets. It stays flexible in cold weather and won’t attract grit.
- Dry lubricant (PTFE-based): ideal for hinges, pivots, and support adjustment points. It dries after application, so it doesn’t collect dust the way wet oils do.
- Anti-seize compound: apply to fastener threads on stainless or dissimilar-metal connections to prevent galling and make future removal easier.
Application tips:
- Wipe the surface clean and dry before applying any lubricant.
- Use a thin, even coat. More is not better; excess lubricant attracts debris and can degrade rubber seals.
- Re-apply after heavy rain, extended coastal or high-salt exposure, or any time you see visible dust accumulation on pivot points.
How do you prepare hoses and supports for seasonal storage?
Trapped moisture is the biggest enemy during storage. Bacteria, mold, and freeze-thaw cycles all do damage that’s easy to prevent with a few deliberate steps.
Cleaning and sanitizing:
- Flush black and gray tanks fully, then run clean water through the hose until it runs clear.
- Remove debris from support brackets and wipe them down with a damp cloth.
- For sanitation, a diluted bleach rinse (follow your hose manufacturer’s guidance on concentration) prevents bacterial growth and odor during storage.
- Let everything dry completely before packing. A damp hose stored in a sealed compartment will smell terrible by spring.
Winterization steps:
- Disconnect the hose from both the RV and the dump inlet before freezing temperatures arrive.
- Store supports dry and flat to prevent permanent set in accordion-style sections.
- Apply a light coat of silicone spray to rubber seals before storage to keep them from cracking in the cold.
- If your rig stays outside, consider a hose cover to block UV and moisture.
When in doubt about propane, electrical, or plumbing winterization, call a certified RV technician. Those systems carry real safety risk if done incorrectly.
How should you prioritize maintenance tasks by risk?
Not every maintenance item deserves equal urgency. Rank tasks by what happens if they fail, not by what they cost to fix.
| System | Consequence of Failure | Likelihood | Priority |
|---|---|---|---|
| Hose coupling seals | Sewage leak, contamination | High | Immediate |
| Support brackets/fasteners | Sag, hose stress, drainage failure | High | Immediate |
| Electrical connections | Power loss, fire risk | Medium | High |
| Slide-out seals | Water entry, interior damage | Medium | High |
| Cosmetic sealant | Minor water intrusion | Low | Deferrable |
Water entry and suspension/mounting integrity fail fast and cascade into expensive repairs. Early failures begin at exposed joints and overlooked interfaces, so inspect those first. Cosmetic issues can wait; a leaking coupling cannot.
How do you troubleshoot drainage problems on uneven terrain?
Start with a quick visual check before touching anything:
- Check slope: Is the hose running consistently downhill from the RV to the dump inlet? Even a short flat section causes slow flow.
- Look for kinks: A kinked hose blocks flow completely. Reposition the nearest support to eliminate the kink.
- Inspect couplings: Squeeze each coupling and twist slightly. Any play means it’s not fully seated.
- Check inlet and outlet seals: Look for cracks or debris blocking the opening.
Step-by-step diagnostic sequence:
- Run a small amount of gray water and watch where flow slows or stops.
- Lift the hose at the problem point. If flow resumes, a support is too low or missing.
- Inspect the coupling at that location for cracks or a broken locking tab.
- If the coupling is intact, reposition the support to restore grade and re-test.
- If flow is still slow after repositioning, flush the hose with clean water to clear any partial blockage.
Temporary campsite fixes: Use a folded towel, a flat rock, or a spare block under a support to restore slope while you source a proper fix. Avoid cross-contamination by keeping the hose off the ground and away from fresh water connections. For more campsite-safe drainage habits, see RV waste drainage best practices.
When should you repair versus replace hoses and supports?
Repair when the substrate is structurally sound. Replace when the load path is compromised.
End-of-life signs for hoses:
- Cracks at coupling points or along fold lines.
- Material that feels brittle or crumbles when flexed.
- Permanent kinks that don’t straighten when the hose is laid flat.
End-of-life signs for supports:
- Elongated bolt holes that no longer hold fastener torque.
- Bent or cracked arms that can’t maintain proper grade.
- Accordion sections with permanent set that prevent height adjustment.
For replacements, choose materials built for road use: UV-resistant construction, reinforced edges and fold points, and stainless fasteners. Flexible accessories tested statically often fail under real-world vibration and thermal cycling, so prioritize products rated for dynamic load rather than static display. Reinforced grommets and edge binding also extend life significantly for any soft goods in your setup.
Rvlevitator makes sewer hose support easier on any terrain
Sewer hose drainage on uneven ground is a real problem, and Rvlevitator built the Levitator support specifically to solve it. The design holds your hose at a consistent grade regardless of what the campsite ground looks like, reducing sag and relieving stress at attachment points where failures typically start.

Installation is quick: no tools required for basic setup, and the system adjusts to compensate for terrain changes without manual hose repositioning. That means fewer trips under the rig and more time enjoying your campsite. The Levitator also shields your hose from ground contact, UV exposure, and wildlife, extending hose life between replacements.
Rvlevitator backs the product with a money-back guarantee and offers compensation for customer feedback, so you’re not taking a risk trying it. Browse the full RV sewer hose support lineup to find the right fit for your rig, or explore support kit options if you want a bundled solution.
Key Takeaways
Consistent interval-based maintenance, load-path inspections, and correct lubrication prevent the majority of sewer-hose drainage failures on uneven terrain.
| Point | Details |
|---|---|
| Four-interval schedule | Run pre-trip, monthly, seasonal, and annual checks on hoses, clamps, brackets, and seals. |
| Load-path first | Inspect joints, fasteners, and attachment points before the hose itself — that’s where failures start. |
| Lubricate every 3–6 months | Use silicone spray for seals, dry lubricant for pivots; re-apply after rain or salt exposure. |
| Replace by load path, not looks | Elongated bolt holes or permanent set in supports means the load path is gone — replace, don’t patch. |
| Rvlevitator Levitator support | Purpose-built for uneven terrain, reduces sag and attachment-point stress, backed by a money-back guarantee. |
Maintenance habits are what actually protect your rig
Most drainage failures and bracket failures aren’t surprise events. They’re the result of skipped pre-trip checks and lubricant schedules that slipped past the 6-month mark. The RVers who avoid roadside headaches are almost always the ones who keep a simple maintenance log, recording dates, what was checked, and any issues flagged for next time. Documented maintenance logs improve resale value and reduce emergency breakdowns — two very practical reasons to spend five minutes writing things down.
The habit that matters most is the pre-trip visual: slope, clamps, coupling seals, bracket torque. It takes under ten minutes and catches the issues that would otherwise ruin a weekend. When something looks borderline, note it and address it before the next trip rather than hoping it holds. For anything involving propane, electrical systems, or structural frame repairs, bring in a certified technician. The Levitator support reduces how often you’re crawling under the rig to adjust hose grade, which makes keeping that pre-trip habit much easier to stick with.
Leave a Reply