
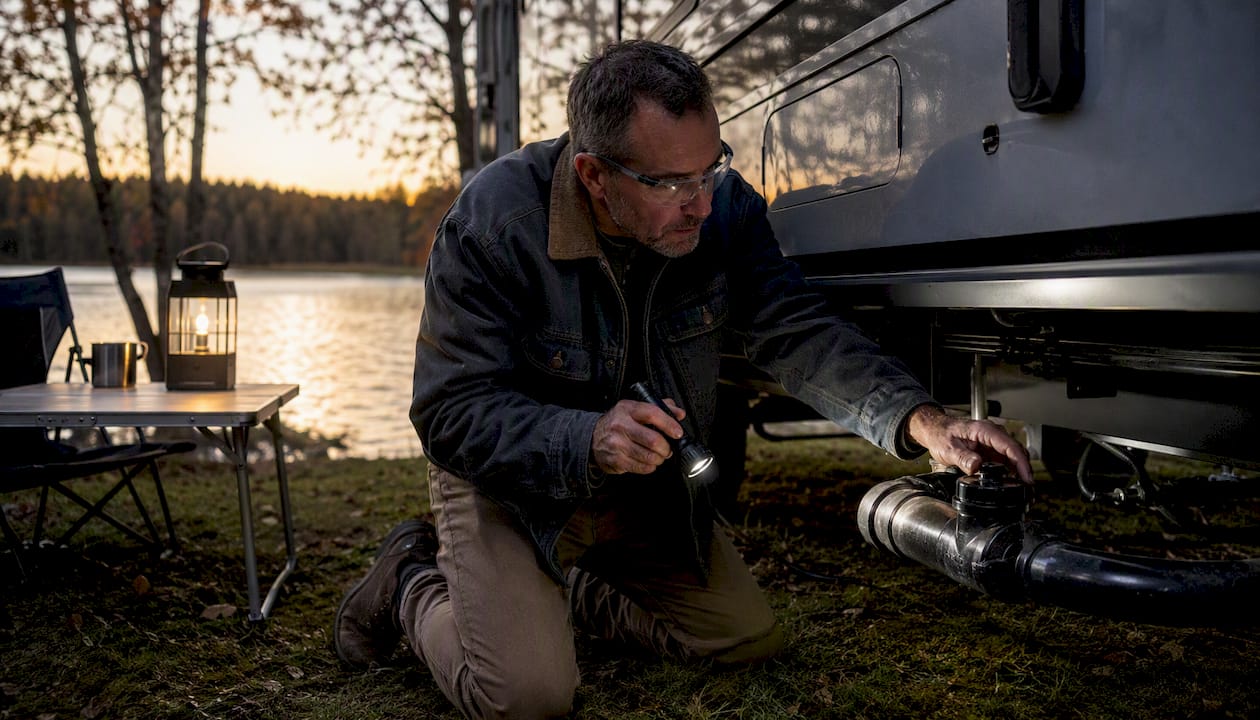
Your gray tank won’t drain, and you need it working now. Before you pull apart any plumbing, run through three quick checks: confirm the gate valve is fully open, watch for actual flow at the sewer connection (not just the gauge), and make sure your sewer hose runs continuously downhill with no sags. Those three things alone resolve the majority of gray water tank issues RV owners report.
If those checks don’t fix it, here are the three fastest repairs to try in 5–15 minutes:
- Open the valve fully and watch the hose outlet. Have someone watch the end of the sewer hose while you pull the valve handle. If nothing flows, the problem is downstream of the valve.
- Straighten and support the hose. A single low spot traps water and mimics a full tank clog. Lift the hose, remove any kinks, and re-pitch it downhill.
- Run a hot-water and dish soap flush. Fill each sink with the hottest water your tap produces, add a generous squirt of a grease-cutting detergent like Dawn, and drain it all at once. This softens grease build-up at the tank outlet.
Safety note: Always wear rubber gloves and eye protection when working near sewer connections. Avoid strong chemical drain cleaners like Drano or Liquid-Plumr. They can damage RV plumbing seals and are not rated for gray-tank use.
Table of Contents
- How do you isolate whether it’s a fixture, tank, valve, or hose problem?
- Common reasons a gray tank stops draining and the quick fix for each
- How to clear a gray-tank clog step by step
- Is the gate valve or its linkage causing the problem?
- How do venting problems and P-traps mimic a tank clog?
- Why a sagging sewer hose can look exactly like a clogged tank
- When should you call a professional RV technician?
- Routine maintenance habits that prevent gray-tank drainage problems
- Key Takeaways
- The fix most RV owners overlook
- A practical tool for RV owners who want to prevent repeat drainage issues
- Useful sources and further reading
How do you isolate whether it’s a fixture, tank, valve, or hose problem?
Pinning down the exact location of the problem saves you from fixing the wrong thing. Work through this sequence before touching any hardware.
- Test your interior drains first. Run water in each sink and the shower. Do they drain slowly on their own, even when the dump valve is closed? If yes, the issue is inside the RV, not at the tank.
- Check the tank gauge, then ignore it. Note the reading, but don’t trust it as your only data point. Residue coats sensors and produces false “full” or “empty” readings constantly.
- Add a known volume of water. Pour two gallons into the kitchen sink with the dump valve closed. Open the valve and time how long it takes to flow out at the sewer connection. A healthy gray tank empties quickly and steadily.
- Watch the sewer connection directly. Use a clear elbow fitting or simply look at the hose outlet. Strong, steady flow points to a healthy tank. A trickle or nothing at all points to a valve, outlet, or hose problem.
- Isolate fixture vs. dump. If interior drains are slow but the timed dump test shows good flow, your problem is an air admittance valve (AAV) or P-trap under a sink. If interior drains are fine but the dump is weak, focus on the gate valve, tank outlet, or hose slope.
Pro Tip: A clear sewer elbow fitting costs a few dollars at most RV supply stores and lets you see flow in real time. It’s one of the most useful diagnostic tools you can add to your kit.

Common reasons a gray tank stops draining and the quick fix for each
Gray water tank issues almost always trace back to one of five culprits. Here’s how to match your symptom to the cause.
| Symptom | Likely Cause | Fast Test | First Action |
|---|---|---|---|
| Nothing flows, valve fully open | Grease plug at tank outlet | Hot-water flush, watch outlet | Hot water + Dawn flush; backflush if no change |
| Strong rush then trickle | Partial outlet clog | Add 2 gal, time flow | Tank wand or backflush |
| Trickle with gurgling sounds | Blocked vent or failed AAV | Remove/test AAV under sink | Replace AAV; check roof vent |
| Slow interior drains, dump fine | P-trap or AAV under sink | Pull and inspect P-trap | Clear hair/soap; replace AAV |
| Slow dump, hose visibly sagging | Hose low spot trapping water | Lift hose, watch flow change | Support hose to restore downhill pitch |

Grease and soap scum are the most common culprits. Grease solidifies as it cools and tends to collect right at the tank outlet, the narrowest point in the system, forming a bottleneck that gets worse over time. Food particles from kitchen sinks compound the problem.
Stuck or partially open gate valves are the second most common cause. A valve that feels open may only be traveling 60–70% of its range due to debris in the track or a worn cable.
Blocked roof vents and failed AAVs create a vacuum effect that slows or stops drainage entirely, even when the tank and valve are both fine. This one catches a lot of RV owners off guard because the symptom looks exactly like a clog.
Sewer-hose sag is frequently misdiagnosed as an internal tank problem. A single low spot in the hose traps water and solids, creating back-pressure that makes the tank appear blocked.
How to clear a gray-tank clog step by step
Start with the least invasive method and escalate only if needed. Most clogs clear at step 2 or 3.
- Put on PPE. Rubber gloves and safety glasses before you touch anything. (2 minutes)
- Hot-water and degreaser flush. Fill the tank to roughly one-third capacity using the hottest water available. Add a full cup of Dawn or a similar grease-cutting detergent through the kitchen sink. If you can safely drive the RV a short distance, do it. The sloshing action breaks up grease deposits. Open the valve and watch the outlet. (15–30 minutes)
- Backflush. With the dump valve open, lift the sewer hose end higher than the tank inlet. This creates a reverse surge that dislodges material stuck directly behind the gate valve. Hold for 30 seconds, then lower the hose. Repeat two or three times. (10–20 minutes)
- Tank flush wand. Insert a tank-wand through the drain opening and direct a pressurized water stream at the outlet and walls. This physically breaks up residue the hot-water flush softened. (15–30 minutes)
- Plumber’s snake. If flow is still restricted, run a standard plumber’s snake through the drain opening toward the tank outlet. Rotate and work it gently. An endoscope camera is optional but useful here if you want to confirm the blockage location before snaking. (20–60 minutes)
Tools you’ll need: rubber gloves, safety glasses, garden hose with hot-water access, Dawn or equivalent degreaser, tank flush wand, plumber’s snake.
Do not use strong chemical drain cleaners. They can damage the rubber seals in RV gate valves and are not designed for the plastics used in RV plumbing. Avoid operating valves under pressure without a cap in place, and never open black-tank fittings unless you’re prepared to contain waste.
Pro Tip: Pressure-rinse tools (Flush King style) work well on straight drain runs but lose effectiveness if your drain line includes even a single 45° turn. Check your layout before investing in one.
For a broader look at why RV waste drains slowly, the diagnostic principles apply to both gray and black systems.
Is the gate valve or its linkage causing the problem?
The gate valve is the single most failure-prone mechanical component in your gray-tank drain system. Before assuming a clog, confirm the valve is actually opening fully.
Diagnostic steps:
- Pull the handle to the fully open position and have someone watch the sewer outlet at the same time. If flow is weak despite the handle being “open,” the valve isn’t traveling its full range.
- Feel the handle as you operate it. Gritty resistance or a sticky mid-stroke usually means debris in the valve track or a worn seal.
- Look for partial opening. Some valves open only halfway due to a frayed cable or a bent rod in the underbelly linkage.
- Inspect the cable or rod if accessible. A frayed cable can slip under load, preventing full valve travel.
Quick field repairs:
- Apply a lubricant rated for RV plumbing (silicone-based, not petroleum-based) to the valve track. Exercise the valve 10–15 times to work it in.
- If the cable is frayed or stretched, a replacement cable kit is available at most RV dealers and installs with basic hand tools.
- Install a twist-on secondary gate valve at the sewer outlet as a temporary safety measure. This stops any seepage past a failing primary valve and buys time before a full underbelly repair.
- If the valve body itself is cracked or the seal is gone, replace it. A replacement gate valve, gaskets, and basic hand tools are all you need. Budget roughly 45–90 minutes for the job and $20–$60 in parts at most RV supply stores, though prices vary by valve size and brand.
Pro Tip: When replacing a gate valve, take a photo of the underbelly plumbing before you start. The routing of cables and rods varies by manufacturer, and a photo saves a lot of guesswork during reassembly.
How do venting problems and P-traps mimic a tank clog?
If your interior drains are sluggish but a timed dump test shows the tank itself flows fine, the problem is almost certainly in your local plumbing, not the tank.
Where to look:
- AAVs (air admittance valves): These small valves sit under sinks and allow air into the drain line to prevent a vacuum. When they fail, they seal shut and create enough back-pressure to stall drainage completely. Testing one takes 30 seconds: unscrew it from its fitting and run the sink. If drainage improves immediately, the AAV is the culprit. Replacement AAVs cost under $15 at hardware stores.
- P-traps: Hair, soap scum, and food debris collect in the curved section of the P-trap under each sink. Remove the trap, clear it, and reinstall. This takes about 10 minutes per sink.
- Roof vent stack: A blocked roof vent creates the same vacuum effect as a failed AAV but affects the whole system. Inspect it visually from the roof for bird nests, leaves, or debris. A garden hose run down the vent stack from the roof can clear most obstructions.
Pro Tip: Never pour chemical drain cleaner into a vent stack. It can damage the stack lining and create a hazardous situation if fumes build up. Use water pressure or a plumber’s snake for vent blockages.
A failed AAV is one of the most commonly overlooked causes of slow gray water drainage, and it’s one of the cheapest fixes in the entire diagnostic sequence.
Why a sagging sewer hose can look exactly like a clogged tank
A sagging hose is one of the most common reasons an RV gray tank appears not to drain, and it’s also one of the fastest to fix. When the hose dips below the sewer connection at any point, water and solids pool in that low spot. The tank may be draining fine, but the waste has nowhere to go.

How to test for it: Lift the middle section of your sewer hose while the valve is open. If flow at the outlet immediately improves or surges, hose slope is your problem.
Why consistent downhill pitch matters: Waste needs gravity to move. Even a small sag of a few inches creates enough back-pressure to slow flow significantly, and over time, solids accumulate in that low spot and create a real blockage.
The fix: Support the hose along its entire run so it slopes continuously from the RV outlet down to the sewer connection. No low spots, no kinks.
This is exactly the problem that Rvlevitator’s sewer-hose support is built to solve. The system suspends the hose above any terrain using a tension line, so the hose maintains a consistent downhill pitch whether you’re on gravel, grass, or uneven concrete. UV-resistant vinyl sleeves protect the hose from sun and abrasion at the same time. Installation is quick, and the support works on any standard RV sewer hose.
Maintenance notes: Check the tension line at the start of each camping season. Inspect the vinyl sleeves for UV cracking annually. A quick wipe-down of the support hardware keeps it working for years.
Pro Tip: Many repeat “clogs” that RV owners blame on grease build-up are actually hose-slope issues. Fix the slope first. If the problem disappears, you just saved yourself an hour of unnecessary tank cleaning.
When should you call a professional RV technician?
DIY troubleshooting covers a lot of ground, but some situations call for a professional. Knowing when to stop saves you from turning a manageable problem into a costly one.
Call a pro when you see any of these:
- The blockage persists after a full hot-water flush, backflush, and snake attempt.
- You see visible cracks, staining, or soft spots on the tank body.
- The underbelly is sealed or inaccessible and the valve linkage is unreachable.
- Waste is backing up into interior drains, which signals a serious blockage or venting failure.
- The roof vent requires ladder access on a tall rig, or the vent stack runs through a complex interior route.
- Gauge wiring or sensor faults are suspected, which requires electrical diagnosis.
What to expect on cost:
- Diagnostic service call: Most RV service shops charge a flat diagnostic fee. Rates vary widely by region and shop, so call ahead for a quote.
- Gate-valve replacement: Parts and labor typically run $75–$200 depending on valve access and rig type, though complex underbelly layouts can push that higher.
- Professional tank cleaning or hydro-jetting: This is the permanent fix when DIY methods fail. Technician recommendations frequently call for hydro-jetting when repeated flushing hasn’t resolved the issue.
What to tell the shop: Describe your symptoms, list every test you’ve already run, note the flow times from your timed dump test, and mention any visible damage. A prepared customer saves shop diagnostic time and often reduces the bill.
Routine maintenance habits that prevent gray-tank drainage problems
Prevention is faster and cheaper than any repair. A consistent routine keeps grease from building up and catches small problems before they become drain gray tank problems.
At every trip:
- Confirm the sewer hose has a continuous downhill slope before connecting.
- Check for visible kinks or sags in the hose run.
- Use a grease-cutting dish soap in the kitchen sink daily to keep the outlet clear.
Every 3–6 months:
- Run a full hot-water and degreaser flush through the gray tank.
- Inspect and exercise the gate valve. Apply silicone lubricant if it feels stiff.
- Test each AAV by running the sink and checking for gurgling or slow drainage.
- Check the roof vent visually for debris or nests.
- Inspect your sewer-hose support for tension and UV wear.
Annually:
- Run a tank-wand cleaning to clear any residue the regular flushes missed.
- Inspect hose fittings and gaskets for cracks or wear.
- Review your black tank dumping sequence to confirm you’re always dumping the black tank before the gray. Dumping gray last uses the cleaner water to rinse the hose.
Pro Tip: Keep a small maintenance log in your RV. Note the date of each flush, valve exercise, and AAV check. When a problem does appear, that log tells you exactly when things last worked correctly and cuts diagnostic time significantly.
For uneven or sloped campsites, a sewer-hose support is the single most effective preventive tool you can add to your setup. It removes hose sag from the equation entirely.
Key Takeaways
Most gray-tank drainage problems trace back to one of four fixable causes: a grease clog at the outlet, a gate valve that isn’t fully opening, a venting failure, or a sagging sewer hose.
| Point | Details |
|---|---|
| Check hose slope first | Lift a sagging hose while the valve is open; improved flow confirms slope is the problem. |
| Hot-water flush before snaking | Hot water plus a grease-cutting detergent clears most outlet clogs without mechanical tools. |
| Verify flow visually | Tank gauges are unreliable; always confirm drainage by watching actual flow at the sewer connection. |
| Escalate methodically | If flush and backflush fail, use a tank wand, then a snake, then call a pro for hydro-jetting. |
| Rvlevitator hose support | A suspended hose support maintains consistent downhill pitch and prevents repeat sag-related drainage issues. |
The fix most RV owners overlook
Most troubleshooting guides focus on what’s inside the tank. The real pattern worth paying attention to is how often the problem is outside it entirely.
Hose sag is responsible for a surprising share of “my gray tank won’t drain” calls. The tank is fine. The valve is fine. But the hose dips two inches somewhere in the middle, and that’s enough to trap waste and create back-pressure that looks exactly like a clog. The owner spends an hour flushing and snaking a tank that didn’t need it.
The same logic applies to AAVs. A $12 valve under the kitchen sink fails, creates a vacuum, and the owner assumes the tank is packed with grease. Replace the AAV in 10 minutes and the problem is gone.
The broader point: always isolate before you treat. The diagnostic sequence in this article exists because the symptom (no flow) has at least five different causes, and the fix for each one is completely different. Skipping the isolation step and going straight to a tank flush wastes time and sometimes makes things worse.
Rvlevitator’s position on this is straightforward. A supported hose that holds its slope eliminates one of the most common repeat causes entirely. It doesn’t fix a grease clog or a broken valve, but it removes hose sag from the list of things you ever have to diagnose again.
A practical tool for RV owners who want to prevent repeat drainage issues
If you’ve worked through this guide and fixed your current drainage problem, the next question is how to avoid repeating it. For RV owners who camp on gravel, grass, or uneven terrain, hose sag is almost guaranteed to come back without a support system in place.

Rvlevitator’s sewer-hose support for uneven ground suspends your hose above any surface using a tension line, keeping a consistent downhill pitch from the RV outlet to the sewer connection. UV-resistant vinyl sleeves protect the hose from sun damage and extend its lifespan. Setup takes minutes, it fits any standard RV sewer hose, and it works whether you’re on a paved pad or a sloped gravel site. Rvlevitator backs the product with a money-back guarantee. Browse the full range of sewer-hose support options and find the kit that fits your rig and campsite setup.
Useful sources and further reading
The sources below were used in researching this guide and are worth bookmarking for follow-up diagnostics or deeper technical reading.
- RV Gray Tank Draining Slowly? Fix Clogs & Flow Issues | RV Repair Question — Practical DIY escalation path and valve-replacement guidance.
- Kitchen Gray Tank Won’t Drain on 2021 Grand Design 31MB | My Grand RV Forum — Real-world backflush case study with user-reported results.
- Slow Gray Water Drain: Causes and Solutions | iRV2 Forum — Community-sourced diagnostic advice and escalation recommendations.
- Grey Water Tank Won’t Drain | Jayco Owners Forum — Discussion of pressure-rinse tool limitations and layout-specific considerations.
- Gray Tank Not Draining on Forest River Cherokee | Forest River Forums — Valve and gauge reliability discussion from a real owner case.
- RV Sewer Hose Support for Any Terrain | Rvlevitator — Product and installation guidance for suspended hose supports.
- Why Every RVer Needs a Sewer Hose Support | Rvlevitator — Practical explanation of hose-sag causes and prevention.
For complex repairs involving tank damage, inaccessible underbelly plumbing, or electrical gauge faults, consult a certified RV technician. This article is general maintenance guidance, not a substitute for professional service on your specific rig.
Leave a Reply