
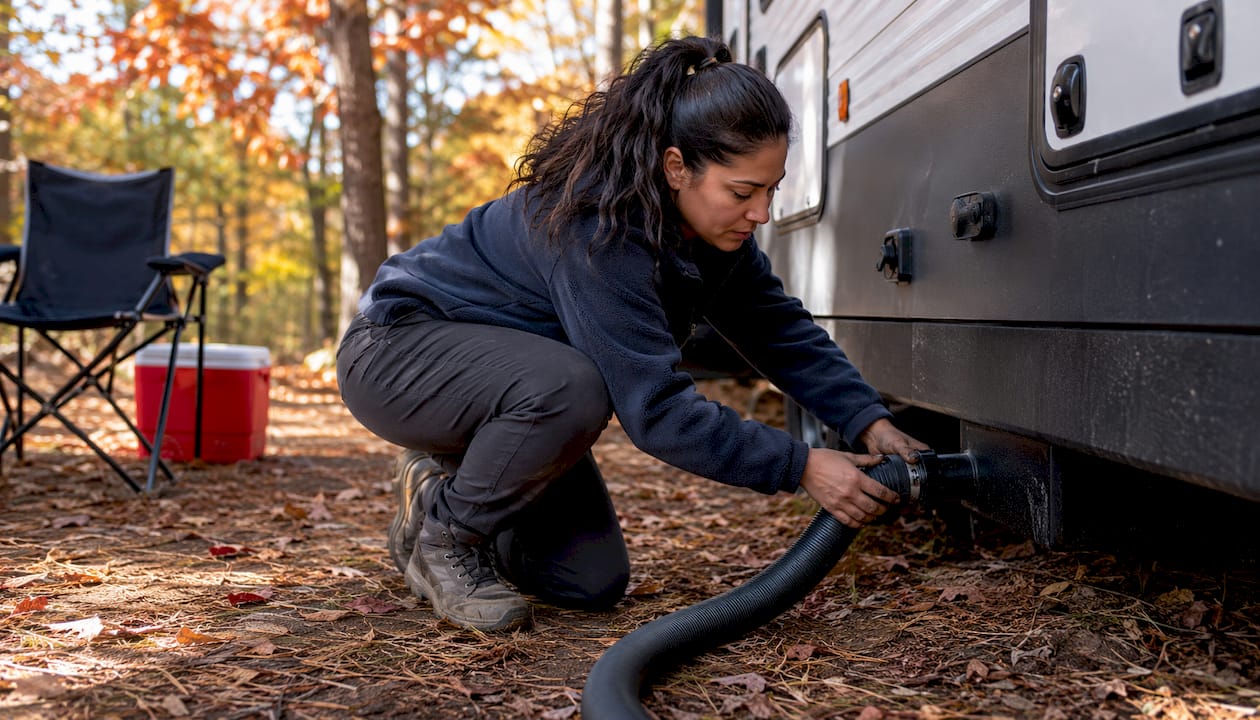
Dump your black tank when it’s two-thirds to three-quarters full and always dump black before gray. That single rule, backed by 2026 industry guidance from Walex and Camping World, prevents most odor, clog, and sensor problems before they start. Here’s the quick how: attach your sewer hose, open the black valve, and monitor a clear elbow until flow stops or runs clear, typically 2–5 minutes. Keep about an inch of water in the toilet bowl at all times to maintain a vapor barrier, and mark your sewer hose so it never touches your potable water line.
- Empty black tank at 2/3–3/4 full; the liquid mass carries solids through the valve.
- Always dump black before gray; gray water rinses the hose afterward.
- Monitor flow through a clear elbow; stop when it runs clear or flow stops.
- Keep ~1 inch of water in the toilet bowl to block odors.
- Mark sewer hoses to prevent cross-contamination with fresh water lines.
Table of Contents
- Why bad drainage habits lead to expensive repairs
- When should you empty your black tank?
- How to safely dump your black tank, step by step
- What gear do you need at the dump station?
- Ongoing maintenance: water, treatments, and sensor care
- Troubleshooting: slow drains, clogs, and persistent odors
- Why hose sag kills drainage and how Rvlevitator fixes it
- Key Takeaways
- The habits that actually save you money
- A straightforward fix for sagging sewer hoses
- Useful sources
Why bad drainage habits lead to expensive repairs
Poor black tank habits don’t just create odors. They create repair bills. Owners who skip routine care can face $150–$800 in repair costs once sensors and valves are involved, and that’s before any professional tank servicing.
The biggest culprit is the pyramid plug. Leave your black valve open at a full-hookup site and the liquid drains away continuously, leaving solids to accumulate directly beneath the toilet drop. Over time, that mass hardens into a cement-like blockage that resists water, ice, and enzyme treatments alike. Getting rid of it often means a service call.
Sensor failures are almost always a maintenance problem, not a hardware problem. Dry tanks, residue buildup, and infrequent flushing coat the sensors until they read “full” when the tank is empty. Fix the habits first, and the sensors usually fix themselves.
Vent issues compound everything. A blocked or frozen roof vent creates a partial vacuum that slows drainage and pulls odors back into the living space. Check your vent cap seasonally and keep the toilet seal moist so gases stay where they belong.
When should you empty your black tank?
The 2/3–3/4 fill rule isn’t arbitrary. A fuller tank means more liquid mass, and liquid moves solids. Dump too early and you get a weak trickle that leaves residue behind. Wait until the tank is mostly full and the waste exits fast, clearing the walls and valve in one good flush.

For practical scheduling, use these patterns as a starting point:
| Use Pattern | Typical Dump Frequency | Notes |
|---|---|---|
| Weekend camper (2 people) | Every 3–5 days | Add water if tank feels light before dumping |
| Full-timer (2 people) | Every 3–4 days | Monitor sensors; flush tank weekly |
| Boondocker | When 2/3 full, regardless of days | Conserve water but never skip the fill rule |
| Day tripper | After each multi-day outing | Top off with water before dumping if needed |
A single dump cycle runs about 2–5 minutes of active flow. If yours is taking longer, check for hose sag or a partial clog before assuming the tank is the problem.
Pro Tip: If you’re ending a trip with a tank that’s less than half full, run water through the toilet a few times to top it off before you dump. You’ll get a much cleaner flush.
How to safely dump your black tank, step by step
Follow this sequence every time and you’ll avoid the most common dump-station mistakes.
- Put on nitrile gloves before touching any fittings or valves.
- Confirm both tank valves are closed, then remove the tank outlet cap.
- Attach your sewer hose securely to the RV outlet using a twist-lock fitting; connect the other end to the dump station inlet.
- Add a clear sewer elbow at the RV end so you can monitor effluent color during the drain.
- Open the black tank valve fully and stand clear during the initial rush.
- Watch the clear elbow for 2–5 minutes until flow stops or the liquid runs clear.
- Close the black tank valve completely; a half-closed valve is the same as an open one.
- Open the gray tank valve and let it drain fully. Gray water flushes soapy residue through the hose.
- Close the gray valve, then disconnect and rinse the hose with a dedicated flush hose (never your fresh water hose).
- Sanitize fittings and gloves, then store the hose in a sealed compartment.
A clear sewer elbow is the single most useful monitoring tool at the dump station. Without it, you’re guessing. With it, you can see exactly when the tank is clear and when a flush is actually working.
Pro Tip: After closing the gray valve, do a quick sniff test by briefly opening the toilet gate valve. A strong odor means residual waste is still in the tank and needs another flush cycle.
What gear do you need at the dump station?
Arrive prepared and the whole process takes under 15 minutes. Here’s what to carry:
| Item | Purpose |
|---|---|
| Dedicated sewer hose | Primary waste transfer; never share with fresh water |
| Clear sewer elbow adapter | Visual confirmation of effluent clarity |
| Black-tank flush hose (marked) | Rinse tank interior; kept separate from all other hoses |
| Nitrile gloves | Hand protection from bacteria and waste |
| Hose support/cradle | Maintains downhill slope; prevents sag and pooling |
| Backflow preventer | Protects flush line from sewer backflow |
| Hand sanitizer or wipes | Final hygiene step after disconnect |
Mark your sewer hose and flush hose with colored tape or permanent marker so they’re impossible to confuse in the field. Store them in a separate compartment from your fresh water hose. A backflow preventer and water pressure regulator on the flush line protect your plumbing from pressure spikes and contamination during the rinse cycle.
Ongoing maintenance: water, treatments, and sensor care
Water is your primary maintenance tool. Keep at least an inch of water in the toilet bowl between uses to maintain the vapor barrier. After every dump, add fresh water to the black tank before your next use to keep the tank moist. Flush the toilet with a full bowl of water each time, especially when boondocking where the temptation to conserve is highest.
- Add tank treatment immediately after dumping so bacterial cultures establish before waste accumulates.
- Enzymatic or probiotic treatments work well for regular use; they break down solids without harming seals.
- Chemical treatments (like formaldehyde-based products) kill odor fast but can damage seals over time. Use enzyme-based options as your default.
- For stubborn false-full sensors, try a hot-water and enzyme soak for 12–24 hours, then a wand flush to clear residue from sensor probes.
- The ice-agitation method (adding ice cubes before a road trip) can loosen fresh deposits through mechanical action.
The most overlooked maintenance step is adding water right after dumping, not right before. Cultures in enzyme treatments need time to establish. If you add treatment and then immediately park the rig for a week, you’re starting from scratch every time.
For odor-free RV living, consistent water habits matter more than any chemical product.
Troubleshooting: slow drains, clogs, and persistent odors
Most black tank problems trace back to one of three root causes. Here’s how to diagnose and fix each one:
| Symptom | Likely Cause | First Fix |
|---|---|---|
| Slow drain | Hose sag, low tank level, or partial clog | Check hose slope first; add water before dumping |
| False-full sensor | Residue coating sensor probes | Enzyme soak + wand flush; repeat 2–3 cycles |
| Persistent odor | Dry bowl, open valve, or blocked vent | Add water to bowl; close valve; inspect roof vent |
For a full pyramid plug, start with a hot-water and enzyme soak. If that doesn’t break it up after 12–24 hours, use a mechanical wand flush directed at the base of the toilet drop. Ice agitation during travel can help with fresh plugs. If none of these work, that’s when you call a professional.
Hose sag is the most underdiagnosed cause of slow drainage. A single low spot in the hose traps solids and reduces flow velocity enough to leave residue in the tank even after a full dump cycle. Fix the slope before assuming the tank needs treatment.
For a deeper look at why RV waste drains slowly, the causes are almost always mechanical before they’re chemical.
Why hose sag kills drainage and how Rvlevitator fixes it
A sagging sewer hose creates a low point where solids settle and liquid pools. That trapped material doesn’t make it to the dump station. It sits in the hose, dries out, and becomes the start of your next clog. On uneven terrain, a hose without support will sag even when you think it’s angled correctly.

Simple blocks and rigid racks work on flat, paved sites. On gravel, grass, or sloped terrain, they shift, tip, or leave gaps that let the hose belly down between supports. Adjustable cradle systems handle uneven ground better, but most require manual repositioning each time.
Rvlevitator’s hose support is built specifically for the terrain problem. It maintains a consistent downhill slope regardless of ground conditions, so solids keep moving and don’t pool mid-hose. Installation is quick: no tools, no complicated assembly. The support also shields the hose from abrasion, UV exposure, and ground contact, which extends hose life noticeably over a season of regular use.
Pro Tip: Place your hose support closest to the RV outlet, where the hose is heaviest when full. That’s where sag starts, and stopping it there keeps the slope consistent all the way to the dump inlet.
For uneven sites specifically, check Rvlevitator’s guidance on RV waste connection on hills before you set up.
Key Takeaways
Consistent black tank habits prevent the vast majority of odors, clogs, and sensor failures without any special equipment beyond a clear elbow and a good hose support.
| Point | Details |
|---|---|
| Fill level before dumping | Wait until the tank is 2/3–3/4 full so liquid mass clears solids through the valve. |
| Valve sequence | Always open black before gray; gray water rinses the hose after the black tank drains. |
| Monitor with a clear elbow | Watch effluent during the 2–5 minute drain; stop when flow stops or liquid runs clear. |
| Water and treatment habits | Keep ~1 inch of water in the bowl; add 2–3 gallons and enzyme treatment right after dumping. |
| Rvlevitator hose support | Prevents sag on uneven terrain, maintains slope, and extends hose life with a quick, tool-free install. |
The habits that actually save you money
The RVers who never deal with pyramid plugs or sensor repairs aren’t doing anything complicated. They’re just consistent. Add water after every dump. Keep the black valve closed at full hookups. Check the roof vent and toilet seal a couple of times a season. Those three habits alone eliminate the most common and most expensive black tank failures.
Small routines prevent large bills. Sensor replacement and professional tank cleaning are avoidable costs for most owners. The fix is almost always behavioral, not mechanical. Start with water, keep the valve closed, and support the hose so it drains completely every time.
A straightforward fix for sagging sewer hoses

If slow drainage or hose sag is a recurring problem at your sites, Rvlevitator’s sewer hose support is a practical, low-effort solution. It holds your hose at a consistent downhill angle on any terrain, flat or uneven, without manual adjustments every time you set up. The install takes minutes, no tools required, and the support protects your hose from ground abrasion and UV damage so it lasts longer between replacements.
Rvlevitator backs the product with a money-back guarantee and offers compensation for customer feedback, so there’s no risk in trying it. Browse the full hose support kit options to find the right fit for your rig, or visit the product page to get started today.
Useful sources
- Walex — industry guidance on fill-level rules
- Camping World — tank dump sequence and valve order
- Just Wheeling It — first-time tank emptying how-to
- Dometic — sanitation and toilet bowl water guidance
- Go RVing — hose marking and safety guidance
- PalmGear — black tank maintenance and repair cost estimates
- The RV Geeks — clear elbow monitoring and flush how-to
- THOR Industries — dump setup safety checklist
- Rvlevitator — RV waste drainage best practices
- Rvlevitator — slow drain troubleshooting guide
Leave a Reply