
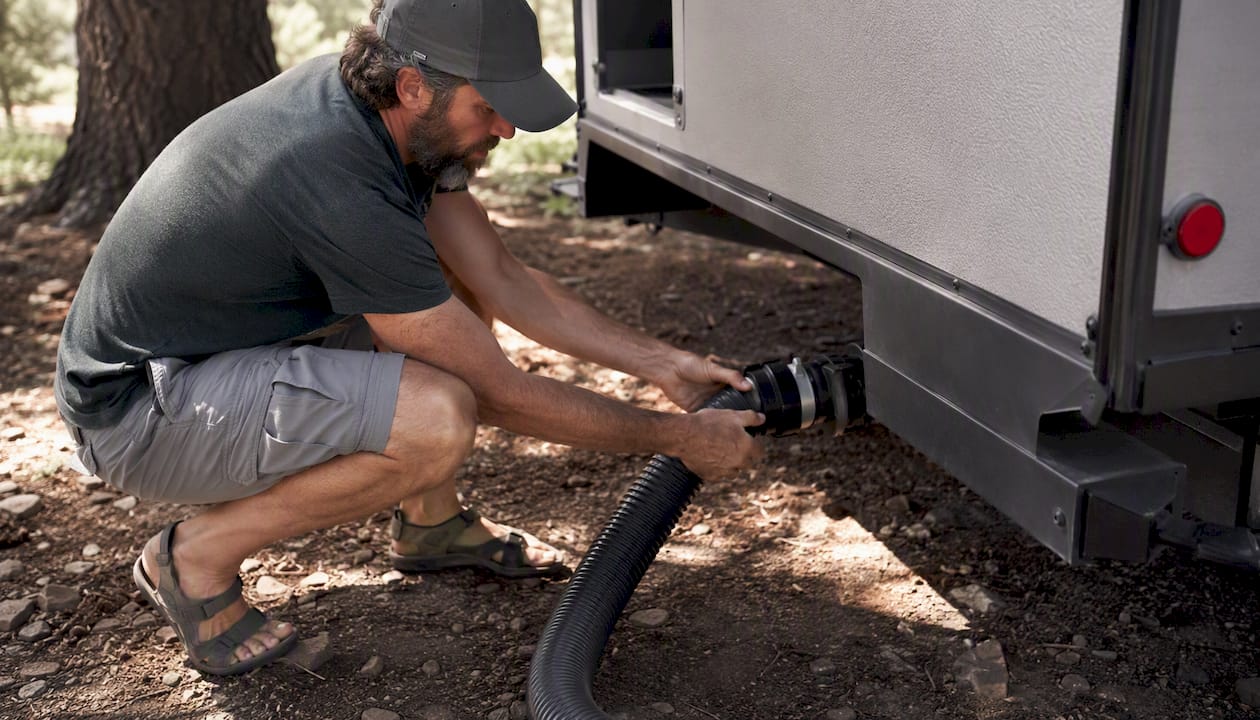
For a tight campsite sewer hose setup, your best first move is a flexible 10–15 ft hose, a clear 90° elbow, and a hose support like the Rvlevitator to keep the run elevated and draining correctly. Pull up to your site and check the distance from your RV’s dump outlet to the campground inlet before you unpack anything.
Your quick hookup kit:
- Hose length: One 10–15 ft flexible, kink-resistant segment (plus a spare 10 ft section in storage)
- Fittings: Clear 90° or 45° elbow, short bayonet extension, and at least one spare donut gasket
- Tools: Strap wrench or bayonet wrench, nitrile gloves, eye protection
- Support: Rvlevitator hose support to hold the hose off the ground and prevent sag
Before you connect anything, check the O-ring on your dump outlet. A cracked or flattened O-ring is the most common cause of leaks in tight spots where you can’t get a good look after the connection is made.
Pro Tip: Never force a stiff bayonet fitting in a cramped bay. If it won’t seat with hand pressure, try rotating the swivel outlet first. Forcing plastic lugs in a tight space cracks them.
Key Takeaways
A flexible 10–15 ft hose, a clear elbow, and a reliable hose support are the three things that make tight campsite sewer hookups work consistently.
| Point | Details |
|---|---|
| Hose length strategy | Use 10–15 ft flexible segments; carry a spare 10 ft section for longer runs. |
| Must-have accessories | A clear 90° elbow, short bayonet extension, spare donut gasket, and a strap wrench handle most tight-site problems. |
| Hookup sequence | Attach RV end first, route on support, then secure inlet end; test with gray tank before opening black tank. |
| Maintenance habit | Inspect O-rings before every trip; dry hoses completely before storage to prevent cracking and odor. |
| Rvlevitator support | Tension-line suspension keeps hoses elevated on any terrain, prevents sag, and reduces disconnections in tight runs. |
Table of Contents
- Why does a tight campsite sewer hookup cause so many problems?
- How do you choose the right sewer hose for tight spaces?
- What adapters and tools make tight hookups reliable?
- How do you connect your sewer hose safely at a tight campsite?
- What are the most common tight-hookup problems and how do you fix them?
- How do you store and maintain your sewer hose to keep it flexible?
- Why does an adaptive hose support help so much at tight, uneven campsites?
- What’s the one habit that makes tight campsite hookups easier every time?
- The Rvlevitator support solves tight-site sewer problems directly
- Sources
Why does a tight campsite sewer hookup cause so many problems?
Three mechanical factors turn a routine sewer connection into a frustrating job: limited hand clearance around the dump outlet, a fixed or recessed outlet orientation that sits behind the RV frame, and hose stiffness that fights you when you try to route it around obstacles.
The clearance problem is the most common. Many newer RV models recess the dump outlet inside a small access compartment. You can barely fit one hand in, let alone apply the torque needed to seat a bayonet fitting. The frame lip blocks the elbow, and you end up twisting the hose instead of the fitting.
Hose stiffness compounds this. A cold, stiff hose resists bending. When you force it into a tight curve, it stores tension that slowly rotates the bayonet connection loose, especially once waste pressure hits. Campground inlets also vary widely — some use threaded connections, some use a simple donut seal, and some are recessed deep in a concrete pad. A bayonet fitting that works fine at one site may not seat cleanly at the next.
Sagging is the third culprit. A hose that dips in the middle traps solids and liquid, slows drainage, and puts sideways stress on both connection points. On uneven ground, even a properly routed hose can develop a low spot within minutes of setup. That sag is also what pulls a loose connection apart under the weight of a full black tank dump.

Diagram callout for page designers: include a photo or line drawing showing an RV dump outlet recessed behind a frame lip, a hose with a visible sag, and a supported hose run with a clear downward slope to the campground inlet.
How do you choose the right sewer hose for tight spaces?
Start here: favor a flexible, kink-resistant hose in 10–15 ft segments. Standard RV sewer hoses run 10–20 ft, and the length you choose directly affects how much sag you fight and how many connectors you add. A single long hose on a short run creates excess slack that sags and traps waste. A hose that’s too short forces you to add connectors, and every connector is a potential leak point.
Many experienced RVers carry two 10 ft segments rather than one 20 ft hose. You use one for short sites, connect both for longer runs, and the shorter segments are easier to route around obstacles in cramped bays.
Length vs. tight-access trade-offs
| Length | Best for | Sag risk | Storage |
|---|---|---|---|
| 10 ft | Short sites, tight bays | Low | Compact |
| 15 ft | Most standard sites | Moderate | Medium |
| 20 ft | Long pull-through sites | Higher without support | Bulky |

What to look for in the hose itself
Beyond length, these attributes matter most when access is cramped:
- Wall stiffness: Choose a hose with reinforced helical or polymer construction. It resists twist and holds its shape when you’re routing it one-handed in a tight bay.
- Compressed vs. expanded length: Some accordion-style hoses compress to a fraction of their extended length. Measure your storage bay before you buy.
- Fitting type: Bayonet fittings are standard on most RVs, but check that the lugs are solid and symmetrical. Weak or uneven lugs strip easily in confined spaces.
- Replaceable O-rings: Buy a hose that uses standard-size O-rings so you can swap them at any hardware store.
- Clear elbow availability: A clear 90° elbow lets you see whether the connection is seated and whether waste is flowing. Worth every penny.
Buying tips:
- Test-fit the compressed hose in your storage bay before leaving the store or opening the box
- Inspect bayonet lugs for symmetry and thickness — thin lugs crack under wrench pressure
- Buy two spare gaskets and a bayonet wrench before your first trip with a new hose
What adapters and tools make tight hookups reliable?
The right accessories turn a frustrating connection into a two-minute job. Strap wrenches and bayonet wrenches are the two tools most RV forum members recommend for confined spaces — they let you apply real torque without skinning your knuckles on a frame edge.
Go-to accessories for tight sites:
- Clear 45° or 90° elbow: Routes the hose away from the frame without forcing a sharp bend in the hose body. The clear plastic lets you confirm the connection is sealed.
- Short bayonet extension (4–6 inches): Moves the connection point out from a recessed outlet so you can grip and turn it with a full hand.
- Soft donut gasket: Compresses to fill irregular inlet shapes. Keep two in your kit.
- Strap wrench: Grips the elbow or bayonet collar without damaging the plastic. Ideal when your hand won’t fit.
- Bayonet wrench: Designed specifically for RV sewer fittings; applies even torque across both lugs.
- O-ring kit: Standard sizes for your hose brand. Replace at the first sign of flattening or cracking.
When to use each one: Use the clear elbow whenever the campground inlet is at an angle or the hose would otherwise press against the frame. Use the short extension when the outlet is recessed and you can’t get a hand around the bayonet collar. The strap wrench earns its place every time you’re working one-handed in a tight bay.
Pro Tip: Before reaching for a wrench, try rotating the swivel dump outlet. Many RV dump assemblies rotate 360°. A quarter-turn can change the outlet angle enough to give you full hand clearance without any tools at all.
A hose cover or carrier also helps in tight runs. When the hose rubs against a frame edge or sits on rough gravel, abrasion wears through the wall faster than UV exposure does. Rvlevitator’s hose cover options protect the hose from both contact damage and sun degradation, which matters most on short, tightly routed runs where the hose can’t avoid contact with the rig.

How do you connect your sewer hose safely at a tight campsite?
The sequence matters as much as the hardware. Attach the RV end first, route the hose on a support, then secure the inlet end — never the other way around. Connecting the inlet end first leaves the RV end flopping loose, and a loose bayonet fitting on a full tank is a mess waiting to happen.
Step-by-step hookup checklist:
- Prepare your gear. Gloves on, eye protection ready. Lay out your hose, elbow, extension (if needed), strap wrench, and spare gasket.
- Confirm both valves are fully closed. Gray and black tank valves must be shut before you touch a fitting.
- Inspect the O-ring on your dump outlet. Press it with a fingertip. If it’s flat, cracked, or hard, swap it now.
- Rotate the swivel outlet to the angle that gives you the most hand clearance before attaching anything.
- Attach the RV end. Seat the bayonet fitting and turn until it locks. Use the strap wrench if clearance is tight. Do not over-torque plastic lugs.
- Route the hose on your Rvlevitator support. The hose should slope continuously downward from the RV to the campground inlet. No dips, no flat sections.
- Attach the inlet elbow or adapter. Seat it firmly and confirm the gasket is compressed evenly around the inlet.
- Secure with a strap wrench if the inlet fitting is loose or the elbow tends to back off.
- Test with the gray tank first. Open the gray valve slowly and watch the clear elbow. Confirm flow and check both connection points for drips.
- Open the black tank valve slowly. A fast open creates a pressure surge that can dislodge a connection that felt secure. Slow and steady.
Safety notes: Keep gloves on throughout. Avoid over-torquing plastic bayonet lugs — hand-tight plus a quarter-turn with a strap wrench is enough. If you see any drip at a connection point after the gray tank test, close the valve and reseat the fitting before opening the black tank.
Pro Tip: A short gray-tank flush before the black dump does two things: it confirms your seals are holding under real flow, and it pre-wets the hose so solids from the black tank move through faster.
What are the most common tight-hookup problems and how do you fix them?
Identify the failure type first: fit problem, seal problem, or support problem. Most tight-site failures fall into one of those three categories, and the fix is different for each.
| Problem | Immediate fix | Longer-term fix |
|---|---|---|
| Hose hits frame, elbow won’t seat | Try a shorter elbow or 45° instead of 90°; rotate swivel outlet | Add a short bayonet extension to move connection point outward |
| Bayonet uncouples under pressure | Reseat and use strap wrench; check lug symmetry | Replace hose with one that has heavier-gauge lugs |
| Leak at connection point | Close valve, reseat fitting, check O-ring | Replace O-ring; apply silicone grease to gasket |
| Slow drain, gurgling | Reposition hose to restore downward slope | Add Rvlevitator support to maintain elevation across full run |
Forum members on Thor owner boards report that recessed outlets on newer rigs often respond to three fixes in order: rotate the dump assembly, add a short extension, and only as a last resort, enlarge the access opening. Owners who enlarged the compartment opening reported much easier access but noted ground clearance concerns and potential warranty implications. Try the non-destructive options first.
Replace these items when you see these signs:
- Hose: Visible cracks, white stress marks on the accordion folds, or a persistent chemical smell after cleaning
- O-ring/gasket: Flat profile, surface cracking, or any deformation that prevents even compression
- Bayonet fitting: Chipped or asymmetric lugs, wobble in the locked position, or a fitting that has been over-torqued and won’t seat flush
Safety warning: If you decide to enlarge the dump compartment opening for better access, measure ground clearance carefully. A low-clearance rig can catch an extended fitting on a speed bump or campground curb. Document any permanent modification with photos and notes for future owners or warranty discussions.
How do you store and maintain your sewer hose to keep it flexible?
Inspect your O-rings and gaskets before every trip. A five-second check at home prevents a 20-minute fix at the campsite. Keeping hoses dry and out of sunlight during storage is the single most effective way to extend their life.
Maintenance checklist after every dump:
- Flush the hose interior with clean water before disconnecting from the campground inlet
- Rinse the exterior and wipe down fittings
- Allow the hose to dry completely before stowing — moisture trapped inside accelerates mold and odor
- Inspect accordion folds for white stress marks or cracks while the hose is extended
- Check O-rings for flatness; apply a thin coat of silicone grease to keep them pliable
- Store in a bumper tube, dedicated tote, or hose carrier — never coiled tightly, which stresses the accordion folds
Replacement intervals: Hoses typically last 2–5 years depending on UV exposure, storage conditions, and how often they’re used. A hose stored in a vented bumper tube away from direct sun will outlast one coiled in an open bay. O-rings and gaskets should be replaced annually as a baseline, or sooner if they show any flattening.
Winter use: If you camp in freezing temperatures, use a heated or winter-rated hose. Standard hoses become brittle below freezing and crack at the folds. A hose that’s fine in October can split on the first cold-weather trip if it was stored with moisture inside.
Storage tip for tight rigs: Two 10 ft segments store more easily than one 20 ft hose. Each segment fits in a standard bumper tube, and you can grab just one for short sites without unpacking the full kit.
For a deeper look at RV hose maintenance best practices, Rvlevitator’s maintenance guide covers cleaning, inspection, and storage in detail.
Why does an adaptive hose support help so much at tight, uneven campsites?
A hose support that adapts to uneven ground keeps your sewer hose elevated and sloped correctly even when the terrain fights you. On a flat concrete pad, gravity does most of the work. On gravel, grass, or a sloped site, a hose without support develops low spots within minutes, and those low spots trap waste and stress both connection points.
How the Rvlevitator support works in tight runs:
- A tension line suspends the hose above the ground rather than resting it on stacked plastic cradles that tip on uneven terrain
- Modular UV-resistant vinyl sleeves protect the hose from abrasion and sun damage along the full run
- The system works on gravel, grass, concrete, and sloped sites without adjustment
- Universal compatibility means it fits standard RV sewer hoses without adapters or modification
- Installation takes minutes: set the support, lay the hose in the sleeve, tension the line
Hose supports and cradles are recommended as essential accessories specifically because they preserve the downward slope that gravity drainage requires. On a tight site where the hose must curve around a frame edge or cross uneven ground, that elevation matters even more.
Rvlevitator backs the product with a money-back guarantee. If it doesn’t solve your sag problem, you’re not out anything. That confidence in the product is worth noting when you’re deciding between a support system and a pile of mismatched plastic cradles that won’t stay level on gravel.
For sewer hose support options across different campsite types, Rvlevitator’s overview covers which configuration works best for each terrain.
What’s the one habit that makes tight campsite hookups easier every time?
Always secure the RV end first, set your support, and then attach the inlet end with a wrench. That sequence keeps the hose controlled and the connection points stable while you work in a confined space.
Before reaching for a grinder or a saw, try rotating the swivel outlet and adding a short extension. Most tight-access problems on newer rigs respond to those two steps without any permanent modification. If you do need to enlarge an access opening, cut only what restores safe hand clearance, and document the modification with photos and measurements. Future buyers and warranty conversations both benefit from a clear record.
The Rvlevitator support solves tight-site sewer problems directly
Sag is the root cause of most disconnections in cramped campsite runs. The Rvlevitator hose support eliminates sag by suspending the hose on a tension line above any terrain, keeping the slope consistent from the RV outlet to the campground inlet.

What you get with the Rvlevitator system:
- Universal fit for standard RV sewer hoses, no adapters needed
- Tension-line suspension that works on gravel, grass, concrete, and sloped sites
- UV-resistant vinyl sleeves that protect the hose from sun damage and abrasion
- Quick installation that takes minutes, not a toolbox
- A protective cover that prevents hose-to-frame contact on tight runs
- A money-back guarantee if it doesn’t perform as described
For tight sites where the hose must curve around obstacles or cross uneven ground, the Rvlevitator support keeps the connection stable and the drainage consistent. Check out the full Rvlevitator product range and see which configuration fits your rig and your typical campsite.
Sources
- Sewer 101: How to Safely Hook Up and Dump Your RV Tanks | Go RVing
- How to Hook Up an RV to Electric, Water, and Sewer at a Campground | Outdoorsy
- Tight sewer hose connection on 2024 24.1 – Thor Forums
Leave a Reply