
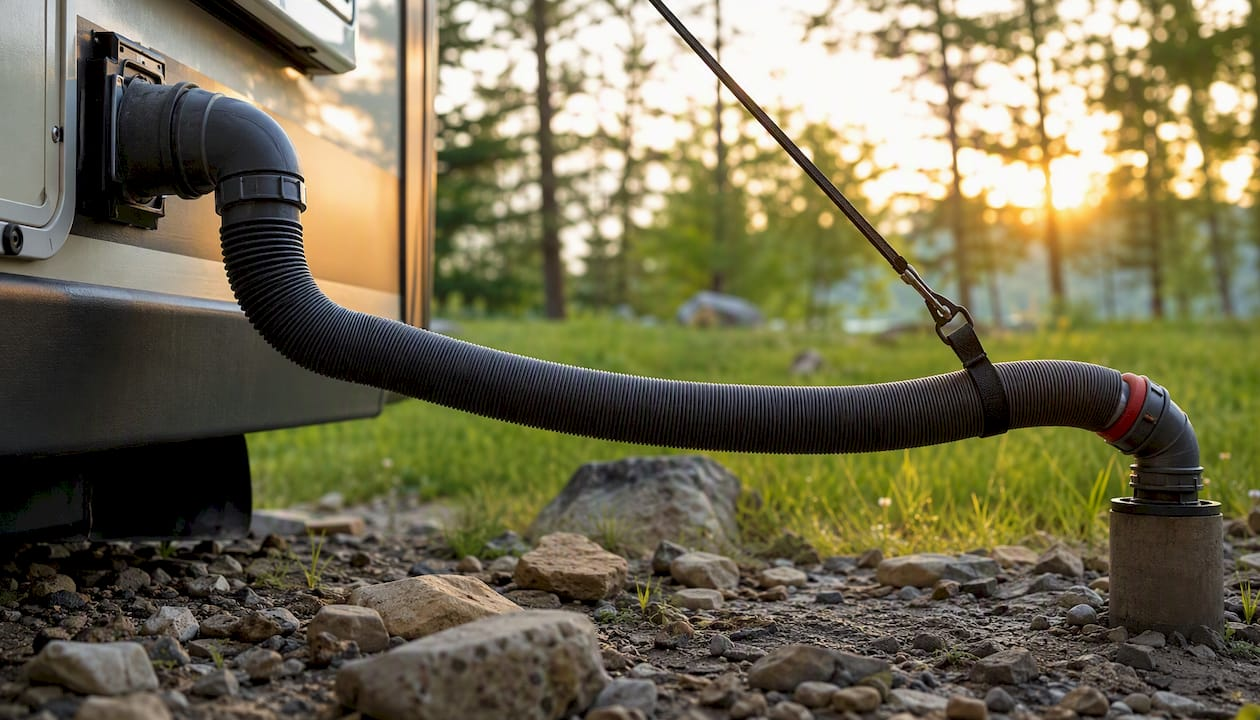
The fastest way to prevent sewer hose pooling is to maintain a continuous downhill slope from your RV outlet to the campground dump inlet, with no dips or low spots along the entire run. A sewer hose support keeps the hose elevated and angled correctly so gravity does the work. Here are three things you can do right now:
- Shorten the hose run. Use only as much hose as you need. Excess length creates slack that sags and pools.
- Add a temporary support. A pool noodle cut lengthwise, a PVC cradle, or any rigid prop under a low spot restores slope immediately.
- Check your fittings. Tighten the bayonet connections at both ends and inspect the O-ring gaskets — a worn or missing O-ring causes leaks even when the connection looks tight.
The industry target is roughly 1/4 inch of drop per foot of hose run. At that angle, solids move through without leaving puddles behind. RV Levitator’s tensioned support system is built around this principle, suspending the hose above any terrain so that slope is consistent from end to end. Note that many campgrounds also prohibit hoses lying directly on the ground, so a support isn’t just good practice — it may be required.
Key Takeaways
Maintaining a continuous downhill slope of approximately 1/4 inch per foot, with supports every 2–3 feet and verified O-ring gaskets at both fittings, is the most reliable way to prevent sewer hose pooling.
| Point | Details |
|---|---|
| Target slope | Aim for ~1/4 inch of drop per foot to keep solids moving and avoid standing water. |
| Support spacing | Place supports every 2–3 feet; no unsupported span should exceed 3 feet. |
| Verify with a flush test | Pour water in at the RV end before dumping to confirm continuous flow with no low spots. |
| Inspect O-rings every trip | Worn or missing gaskets cause leaks even when connections look tight; carry spares. |
| Rvlevitator suspension system | Tensioned line suspends the hose above uneven terrain with UV-resistant sleeves for a consistent slope and long hose life. |
Table of Contents
- What are the best DIY fixes to stop sewer hose pooling fast?
- When does a commercial support make more sense than DIY?
- How do you set the right slope and verify no pooling?
- How do you handle uphill hookups, long runs, wind, and winter?
- Which hose cover and sleeve materials actually protect your hose?
- Why do tensioned suspension supports outperform other options?
- Step-by-step checklist: how to install supports and confirm no pooling
- What experienced RVers actually find works in the field
- Rvlevitator keeps your hose suspended and your campsite clean
- Sources
What are the best DIY fixes to stop sewer hose pooling fast?
Quick, inexpensive supports can stop wastewater pooling within minutes. Each option below has a specific use case, so pick the one that matches your situation.
- Pool noodles (cut lengthwise): Slice a standard foam pool noodle down the middle and lay the hose in the channel. These are lightweight, cheap, and easy to carry. The downside is UV degradation — foam breaks down after a season or two of direct sun exposure, so replace them regularly.
- PVC half-pipe or split conduit: Cut a length of 3-inch PVC pipe in half lengthwise to create a rigid cradle. This holds its shape better than foam, handles heavier hoses, and lasts much longer. It’s the better choice when you need a stable, repeatable setup at a site you return to often.
- Vinyl gutters or milk-crate channels: For longer runs or uneven ground, a section of vinyl rain gutter (the kind sold at hardware stores) gives you a continuous channel that bridges small ground irregularities. Milk crates work well as mid-run risers when you need height quickly.
Slope guidance from field experience confirms that pool noodles, PVC half-pipes, and vinyl gutters are the three most common DIY approaches — each one works, but the right choice depends on how long your run is and how uneven the ground is.
Shortening the hose run is often the most effective fix of all. If you’re using 20 feet of hose when 10 feet would reach, cut the run in half. Fewer feet means fewer potential low spots. Adding an elbow fitting at the dump inlet also reduces sharp bends that cause backups, and a clear elbow lets you see when the tank has fully emptied — a small upgrade that pays off every dump.
Pro Tip: Space your DIY supports so no section of hose runs unsupported for more than 3 feet. Place each support slightly higher than the last as you move from the dump inlet back toward the RV, so the slope is continuous rather than a series of flat sections with sudden drops.
When does a commercial support make more sense than DIY?
DIY works fine for occasional campers. For full-timers, frequent dumpers, or anyone dealing with rough terrain, a purpose-built support pays for itself quickly.
Accordion/slinky supports are the most common commercial option. They fold flat for storage and expand to span the full hose run. The tradeoff is wind stability — a fully extended accordion support is light and can shift or tip in a strong gust. Shaping the support into a C or S curve rather than a straight line adds resistance to wind and keeps the dump end from popping out of the inlet.

Telescoping and adjustable-leg stands are the right call for uphill hookups or sites with significant grade changes. You can raise individual legs to compensate for uneven ground and maintain a consistent slope even when the terrain works against you. These are heavier than accordion supports but far more stable.
Plastic snap-together modular ramps offer a middle ground. They’re more durable than foam noodles, lighter than PVC, and stack neatly for storage. Many systems are sold in kits that include multiple ramp sections you connect end to end.
Here’s a quick guide to choosing the right commercial style:
- Flat, level ground, short run: A basic accordion support handles this well.
- Uneven or sloped ground: Adjustable-leg stands or a tensioned suspension system.
- Frequent travel, compact storage: Snap-together modular ramps or a folding slinky.
- Winter use or long-term site: Insulated or enclosed supports that protect against freezing.
Retail kits that bundle supports with elbow fittings and hose sleeves are widely available and convenient for weekend users who want a complete setup without sourcing parts separately.
How do you set the right slope and verify no pooling?
Getting the slope right is straightforward once you know the target. Here’s how to set it up and confirm it’s working.
- Set the target angle. Aim for approximately 1/4 inch of drop per foot of hose run. For a 10-foot run, that’s about 2.5 inches of total drop from the RV outlet to the dump inlet. For a 15-foot run, roughly 3.75 inches.
- Measure in the field. You don’t need a laser level. Lay a standard 4-foot carpenter’s level on top of the hose and check the bubble. Shim supports up or down until the bubble shows a consistent lean toward the dump end. A small torpedo level works even better for tight spots.
- Space your supports correctly. Place a support every 2–3 feet along the run. Longer unsupported spans allow the hose to belly between supports, which creates exactly the low spots you’re trying to eliminate.
- Run a water flush test. Pour a bucket of water into the hose at the RV end and watch it flow. If it moves steadily toward the dump inlet with no pooling or hesitation, your slope is correct. If it stalls or backs up, find the low spot and raise that section.
- Check connection points. At both the RV outlet and the dump inlet, confirm the bayonet fittings are fully seated. A small twist can open a connection that looks tight. Inspect the O-ring at each fitting — worn or missing gaskets are one of the most common causes of leaks, and carrying a few spare O-rings costs almost nothing.
The water flush test takes 30 seconds and catches problems before you dump. Make it a habit every time you set up.
How do you handle uphill hookups, long runs, wind, and winter?
Real campsites don’t always cooperate. Here’s how to handle the four scenarios that cause the most trouble.
Uphill hookups
When the campground dump inlet sits higher than your RV outlet, gravity works against you. Your options:
- Raise the hose at the RV outlet using a ramp or adjustable stand to create a high point, then let the hose descend to the inlet.
- Shorten the hose run as much as possible — the shorter the run, the easier it is to manage the elevation change.
- Use adjustable-leg supports to build a continuous slope from a raised outlet down to the inlet, even when the ground slopes the wrong way.
Long runs
Every extra foot of hose is another opportunity for a sag. For runs over 15 feet, splice two shorter hoses rather than using one long one — shorter sections are easier to support and less likely to develop mid-run belly. Add a support at every joint.
Wind and traffic
Accordion supports shaped into a C or S curve resist wind better than a straight run. Secure both ends of the hose before you leave the site unattended. When you’re not actively dumping, cap the dump-inlet end and stow the hose if your stay is longer than a day or two.
Winter-specific precautions
Cold weather turns pooled water into ice, which can crack hose fittings and block flow entirely. A few targeted steps prevent this:
- Dump when your tanks reach about two-thirds full rather than waiting for them to top off. Smaller, more frequent dumps leave less residual water sitting in the hose.
- Keep the gray and black tank valves closed until you’re ready to dump. Leaving them open allows liquid to trickle out slowly, which pools and freezes in low spots.
- Use insulating sleeves or a heated hose wrap in sustained freezing temperatures.
- After dumping, flush the hose with a small amount of clean water, then disconnect and store it rather than leaving it connected overnight in freezing conditions.
Which hose cover and sleeve materials actually protect your hose?
The support keeps the hose off the ground. The sleeve or cover protects it from everything else — sun, abrasion, birds, and road debris.
- UV-resistant vinyl sleeves: These slide over the hose and shield it from direct sun, which is the primary cause of hose brittleness over time. Vinyl breathes enough to prevent moisture buildup against the hose wall. Rvlevitator’s included sleeves are built to this standard, protecting the hose while the tension line holds it elevated.
- Rigid PVC half-pipe: Durable and long-lasting, but heavier than vinyl and harder to store. Best for permanent or semi-permanent setups where you’re not moving the rig frequently.
- Flexible pool noodle: Easy to use and cheap, but foam degrades in UV and doesn’t protect against abrasion from gravel or pavement. Replace annually if you use these.
- Rubberized hose protectors and fabric sleeves: Good abrasion resistance and easy to wipe clean. Fabric sleeves in particular are popular for hose storage between trips because they keep the hose clean and contained.
Keeping the hose elevated reduces exposure to ground puddles, dirt, and bacteria — all of which shorten hose life and create odor problems. A sleeve that traps moisture against the hose wall defeats this purpose, so avoid tight-fitting covers that don’t allow any airflow.
When selecting a sleeve, match the inner diameter to your hose’s outer diameter. A sleeve that’s too tight is hard to install and can restrict the hose’s natural flex. One that’s too loose slides around and doesn’t protect the sections you need covered.
Pro Tip: Inspect your hose and sleeve together at the start of each season. Look for cracks, soft spots, or discoloration on the hose, and check the sleeve for tears or UV brittleness. Replacing a $15 sleeve is far cheaper than replacing a damaged hose.
Why do tensioned suspension supports outperform other options?
Most support systems hold the hose up at specific points, which means the hose still sags between those points. A tensioned suspension approach works differently: a line runs the full length of the hose run, and the hose hangs from it continuously, so there are no unsupported spans and no low spots.

On uneven terrain — gravel pads, sloped sites, grass with ruts — this matters a lot. A rigid ramp system requires relatively flat ground to work as designed. A tensioned line adapts to whatever the ground does beneath it, keeping the hose at a consistent height regardless of what’s underneath.
Rvlevitator’s sewer hose support system is built on this principle. The tensioned line suspends the hose above the ground, and the included UV-resistant vinyl sleeves protect it along the entire run. Setup is quick, it’s compatible with standard hose sizes, and you need fewer mid-run contact points than with a ramp-based system. The reduced contact also means less abrasion on the hose exterior, which extends hose life noticeably.
From a practical standpoint, a suspended hose is also less likely to pop off at the dump inlet. When a hose sags, the weight of pooled waste pulls the dump end downward and outward — exactly the direction that breaks the bayonet seal. A tensioned system keeps the dump end stable and aligned.
Rvlevitator backs the product with a money-back guarantee, and their site includes setup guides and maintenance resources for readers who want to go deeper on long-term care.
Step-by-step checklist: how to install supports and confirm no pooling
Follow these steps at the campsite before your first dump.
- Position the RV. Park as close to the dump inlet as your site allows. Less distance means a shorter hose run and fewer potential low spots.
- Lay out the hose. Extend only as much hose as you need. Coil any excess and store it rather than leaving it in the run.
- Place your supports. Set a support every 2–3 feet, starting at the dump inlet and working back toward the RV outlet. Each support should sit slightly higher than the one closer to the inlet.
- Attach fittings. Connect the dump-inlet end first, seating the bayonet fully and confirming the O-ring is in place. Then connect the RV outlet end.
- Check the slope visually. Crouch down and sight along the hose from the RV end. The hose should descend continuously toward the dump inlet with no visible dips.
- Run the water flush test. Pour a small bucket of water into the hose at the RV end. Watch it travel the full length and exit at the dump end. Any hesitation or pooling points to a low spot — raise that section and re-test.
- Tug each connection. Give both the RV outlet and the dump inlet a firm tug. Neither should move. A loose connection is a leak waiting to happen.
- Inspect gaskets one more time. Visually confirm the O-ring at each fitting is seated and undamaged.
Common setup failures to watch for:
- Hose kinking at the RV outlet: Add a 90-degree elbow fitting to smooth the transition from the outlet to the hose run.
- Dump end popping out: The hose is sagging near the inlet. Raise the last support before the inlet so the hose enters at a slight downward angle rather than a flat or upward one.
- Low spot mid-run: Usually caused by a support that’s too short or has shifted. Replace or shim it until the sag disappears.
A beginner’s setup guide with photos is available on the Rvlevitator site if you want a visual reference alongside these steps.
What experienced RVers actually find works in the field
The gap between what looks good on paper and what holds up at a real campsite is where most RVers learn their lessons. A few patterns come up consistently.
O-ring failures are the most common source of leaks that get blamed on pooling. The connection looks tight, but a missing or flattened gasket lets liquid seep out at the fitting rather than flow through the hose. Carrying three or four spare O-rings in your hookup kit costs almost nothing and has saved many a dump session from turning into a cleanup job.
Hose twists are the second most common problem. When you connect the hose at both ends without checking for rotation, the hose can twist 90 degrees or more along its run. That twist creates a partial kink that slows flow and can torque the bayonet connection open over time. Always lay the hose out straight before connecting both ends.
Wind is underestimated. A straight accordion support on a breezy site will shift, tip, or collapse. RVers who camp frequently in open or coastal sites tend to move away from accordion supports entirely and toward either tensioned suspension systems or modular snap-together ramps that sit lower to the ground and are harder to knock over.
For full-timers and frequent travelers, the consensus leans toward tensioned suspension. The setup time is comparable to a slinky, but the result is more consistent across different terrain types. On a gravel pad, a sloped site, or a grass site with soft ground, a tensioned line maintains slope where a ramp system would require shimming and adjustment. Rvlevitator’s approach fits this use case well — it’s designed specifically for the uneven-ground problem that causes the most pooling complaints.
Rvlevitator keeps your hose suspended and your campsite clean
Pooling sewer hose problems often come down to one thing: the hose touching the ground and sagging between supports. Rvlevitator’s tensioned sewer hose support system solves this directly. The tension line suspends the hose above any terrain, UV-resistant vinyl sleeves protect it along the full run, and the whole system installs in minutes without tools.

It works on gravel, grass, sloped pads, and uneven sites where ramp-based systems need constant shimming. Universal compatibility means it fits standard hose sizes without adapters. And if it doesn’t work for your setup, Rvlevitator’s money-back guarantee means you’re not taking a risk.
Browse the full sewer hose support collection to find the right kit for your rig and campsite type.
Sources
- Mastering Your Rv: How To Hook Up Rv Sewer Hose Like A Pro
- Rv Sewer Hose Support Ideas
- how best to secure sewer hose connections? | The RV Forum an RV LIFE Community
Leave a Reply