
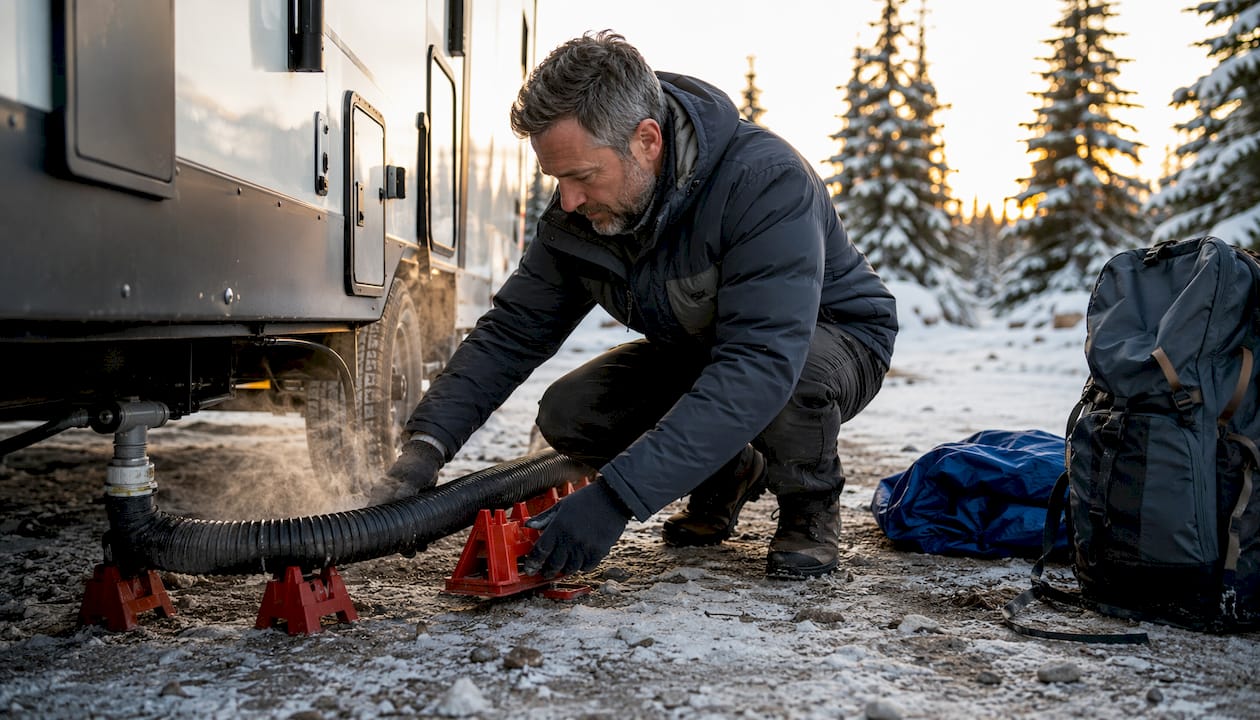
The single best way to prevent RV sewer hose freezing on uneven ground is to keep the hose running continuously downhill using physical supports, keep your tank valves closed between scheduled dumps, and add insulation or active heat only when temperatures push below freezing. That three-part approach, what experienced RVers and dump-station winter guidance call a system approach, stops most freezes before they start. For uneven campsites specifically, Rvlevitator’s tension-line support with UV-resistant vinyl sleeve is the recommended starting point because it holds a continuous downhill pitch regardless of what the ground underneath is doing.
- Slope first. A hose that drains completely after every dump has almost no standing water to freeze.
- Valves closed. Keeping valves shut and dumping on schedule produces a high-volume flush that clears the line.
- Layer protection. Insulation, wind blocking, and active heat are supplements, not substitutes, for good drainage.
Critical zone: Standing liquid in a sewer hose becomes high-risk for freezing at temperatures between 25°F and 30°F, which is well before the textbook 32°F freezing point.
Table of Contents
- What to do right now before temperatures drop
- How and where sewer hoses actually freeze
- Why physical supports are the highest-impact fix for uneven ground
- Insulation and active heating: which option fits your situation?
- Storing and maintaining your hose to avoid cold-weather damage
- If your hose freezes at camp: safe step-by-step recovery
- How to choose the right hose support or cover for uneven terrain
- Key Takeaways
- Why a system approach beats any single product
- Rvlevitator keeps your hose protected on any terrain
- Sources and further reading
What to do right now before temperatures drop
Run through this checklist the moment overnight lows are in the forecast:
- Close all tank valves. Gray and black valves stay shut until you are ready to dump. A slow trickle through an open valve creates layered ice over time, not a safe drain.
- Schedule a high-volume dump. A full tank dump produces the fast, forceful flow that clears the line. Partial dumps leave residual liquid sitting in low spots.
- Lift the RV end of the hose after dumping. Walk the hose from the RV toward the inlet to purge any remaining liquid.
- Pour RV-safe antifreeze down fixtures after dumping if you expect sustained sub-freezing temps overnight.
- Place supports under any dip or sag in the hose run. Even a rolled sleeping bag or a flat rock under a low spot helps until you have a proper support in place.
- Check your dump-station setup using a resource like CampGazer to confirm pedestal power availability before relying on any electric heating solution.
Pro Tip: When overnight lows hit the mid-20s, disconnect the hose entirely after dumping and store it in a heated compartment. Experienced RVers consistently call this the single most reliable cold-weather habit.
How and where sewer hoses actually freeze
Water begins to freeze at 32°F, but the real danger for sewer hoses starts earlier. Standing liquid in a hose becomes high-risk for freezing at temperatures between 25°F and 30°F, especially when that liquid is sitting still in a low point rather than moving through.

The most vulnerable spot is the upward-sloping section immediately before the sewer inlet. Gravity prevents complete drainage there, so liquid pools and freezes first. Any “dip-and-rise” in the hose run, where the hose dips down and then rises back up before the inlet, traps water the same way.
Several factors accelerate the problem:
- Wind chill. Exposed hose runs lose heat faster than the air temperature alone suggests.
- Ground conduction. A hose lying directly on frozen ground or concrete loses heat through contact, not just through the air.
- Low-volume trickles. Slow-moving water from a partially open valve can freeze inside the hose and form an ice plug over time.
- No underbelly protection. RVs without an enclosed underbelly or skirting expose the connection point to full wind exposure.
One habit that surprises a lot of RVers: leaving valves slightly open to create a trickle does not prevent freezing. It makes it worse.
Why physical supports are the highest-impact fix for uneven ground
On a flat campsite, gravity does most of the work. On uneven terrain, you have to create the slope yourself. That is where a modular support system earns its place.
Step-by-step setup:
- Lay the hose out along its full run before connecting anything.
- Identify every low point or dip-and-rise section. These get supports first.
- Anchor the tension line at the RV end and route it toward the sewer inlet, keeping a continuous downhill angle.
- Space supports roughly every 2–3 feet, or closer in any section that still shows a sag.
- On soft soil, use ground stakes included with the kit. On concrete pads, use weighted anchor blocks or strap to a fixed point.
- After connecting, do a visual check from the RV end to the inlet. The hose should run downhill with no visible dips.
Placement priorities:
- The last 5–10 feet before the sewer inlet, where pooling risk is highest.
- Any section that crosses a slope change or a ground irregularity.
- Anywhere the hose previously sagged or showed residual liquid after a dump.
Pro Tip: On very uneven ground, combine short rigid risers under the hose with a tension line above it. The risers lift the low spots; the tension line prevents the hose from kinking at the high points. Check support points daily in freeze conditions, since soft ground can shift overnight.
Inspect the setup each morning. Ground that was firm at setup can settle or frost-heave overnight, dropping a support and creating a new low point. For a full overview of hose support options by terrain type, Rvlevitator’s site covers the tradeoffs clearly.

Insulation and active heating: which option fits your situation?
Supports handle the drainage problem. Insulation and heat handle the temperature problem. They work best together, not as substitutes for each other.
| Protection method | Best temperature range | Power needed | Key limitation |
|---|---|---|---|
| Foam pipe insulation | Down to ~25°F | None | Won’t hold below 25°F in extended exposure |
| UV-resistant vinyl sleeve | Down to ~25°F | None | Passive only; pairs with supports |
| Wind-blocking tarp/tent | Reduces effective wind chill | None | Doesn’t add heat, only reduces loss |
| Heat tape / heat cable | Below 25°F | Shore power or generator | GFCI required; never coil |
| Heated sewer hose sleeve | Below 25°F (thermostat-controlled) | 120V shore power | Campground pedestal capacity required |
A few things worth knowing before you add active heat:
- Foam pipe insulation buys meaningful protection down to moderately low temperatures, but extended exposure below that requires active heat or disconnection.
- Tenting the last 5–10 feet of the hose run with a plastic sheet or tarp creates a dead-air layer that significantly reduces wind-chill impact at the connection point.
- Heat cable must run straight, never coiled, and always on a GFCI-protected outlet. Never use open flames near a sewer hose.
- Heated hoses typically run on 120V and cost roughly $150–$250. Confirm your campground pedestal can handle the load before plugging in.
The protective sleeve on Rvlevitator’s system does double duty: it adds passive insulation and acts as a mechanical buffer that reduces thermal-shock cracking in plastic hose material.
Storing and maintaining your hose to avoid cold-weather damage
Cold weather does more than freeze water. It makes plastic brittle. Thermal shock from repeated freeze-thaw cycles causes hairline cracks that are invisible until the hose leaks at the worst possible moment.
Build these habits into every cold-weather camp:
- After every dump: drain the hose completely, wipe down the exterior, and inspect for any new cracks or stiff sections.
- Before a forecast freeze: store the hose inside a heated compartment. If exterior storage is unavoidable, keep it in an insulated sleeve and off the cold ground.
- At the end of the season: do a full flex-and-inspect before storing. Any section that feels stiff or shows surface cracking should be replaced.
Pro Tip: Pack a lightweight backup hose and a small repair kit on every winter trip. A cracked fitting at a remote campsite with no hardware store nearby is a genuinely unpleasant situation. Good hose storage habits between trips extend hose life significantly.
If your hose freezes at camp: safe step-by-step recovery
- Stop using the system. Do not try to dump through a frozen hose or force a frozen valve open.
- Disconnect the hose if you can do so without forcing it. Carry it to a heated space, like inside the RV or a utility building, and let it thaw slowly at room temperature.
- For frozen fittings at the inlet: pour warm (not boiling) water around the fitting, or hold a warm wet cloth against it. A portable electric heater aimed at the compartment works well for a few minutes.
- Once thawed: flex the hose gently along its full length. Feel for any stiff sections or hear for any cracking sounds.
- Inspect for damage: look for hairline cracks, soft spots, or leaks at the fittings. If you find any, replace that section before reconnecting.
When to replace rather than repair: if the hose leaks after thawing, or if any section feels permanently stiff and won’t flex back to normal, replace it. A cracked sewer hose is a health hazard, not just an inconvenience. For a full dump-station setup walkthrough after a freeze event, Rvlevitator’s guide covers reconnection and post-thaw checks step by step.
How to choose the right hose support or cover for uneven terrain
Not all support systems work equally well when the ground is uneven. Here is what to check before buying:
- Hose diameter compatibility. Confirm the support fits standard 3-inch sewer hose, and check whether it accommodates any adapter fittings you use.
- Anchor options. You need a system that works on both soft soil and hard pads. Look for included ground stakes and a hard-surface anchor option.
- Adjustability. A tension-line design lets you dial in the slope regardless of what the ground is doing underneath. Fixed-height risers alone won’t cut it on variable terrain.
- Sleeve material. UV-resistant vinyl holds up to sun, cold, and abrasion. Thin plastic sleeves crack in cold weather, which defeats the purpose.
- Warranty and guarantee. A money-back guarantee signals the manufacturer stands behind the product in real-world conditions.
Feature priorities by use case:
- Occasional cold nights: foam insulation wrap plus a support system to maintain slope.
- Extended winter stays: tension-line support, insulated sleeve, wind-blocking tarp, and active heat when temps drop below 25°F.
- Full-time use in cold climates: all of the above, plus a heated hose sleeve on shore power and a strict disconnect-and-store habit for the coldest nights.
Rvlevitator’s tension-line design addresses the adjustability and anchor problems directly. The modular sleeve slides over the hose after the support is rigged, so you get slope control and passive insulation in one setup. For more on sewer hose setup from scratch, the beginner’s guide walks through the full process.
Key Takeaways
Preventing a frozen RV sewer hose on uneven terrain requires a slope-first system: supports to drain the hose, insulation to slow heat loss, and active heat only when temperatures fall below 25°F.
| Point | Details |
|---|---|
| Slope is the primary fix | Use supports to maintain a continuous downhill pitch; eliminate all dip-and-rise sections first. |
| A critical temperature threshold is when standing liquid in a sewer hose becomes high-risk for freezing, occurring at temperatures between 25°F and 30°F, well before the freezing point of 32°F. | |
| Close valves, dump on schedule | A high-volume flush clears the line; a slow trickle from an open valve creates ice plugs. |
| Disconnect in sustained freezes | Storing the hose in a heated compartment is the most reliable protection in prolonged sub-freezing temps. |
| Rvlevitator for uneven terrain | The tension-line support with UV-resistant vinyl sleeve holds a continuous downhill slope on any ground surface. |
Why a system approach beats any single product
The most common mistake RVers make in cold weather is reaching for a heated hose and assuming the problem is solved. Active heat is useful, but it does not fix a hose that sags in three places and holds a cup of standing water at every low point. That water will freeze, heater or not, if the exposure is long enough and the temperature drops far enough.
The sequence matters: slope and drainage first, then insulation, then wind blocking, then active heat as the last layer. Each step reduces the load on the next one. A hose that drains completely after every dump needs far less insulation than one that pools. A well-insulated hose needs far less active heat than a bare one.
Rvlevitator’s design reflects that logic. The tension-line system creates the slope; the vinyl sleeve adds the insulation layer. That combination handles the majority of cold-weather camping situations without needing shore power or a generator. For the nights when temperatures fall hard and fast, you add heat on top of an already well-protected setup, not instead of one. The money-back guarantee means you can test that system at your actual campsite without risk.
Rvlevitator keeps your hose protected on any terrain
Uneven campsites are where most sewer hose problems start, and where a good support system pays for itself on the first cold trip. Rvlevitator’s tension-line support suspends your hose above any ground surface, eliminating sag and maintaining the continuous downhill slope that prevents pooling. The included UV-resistant vinyl sleeve adds passive insulation and protects the hose from cracking in cold, dry conditions.

Setup is straightforward: anchor the line, route it downhill, space the supports every 2–3 feet, and slide the sleeve over the hose. No tools required for most installations. Rvlevitator backs every kit with a money-back guarantee, so if it does not work for your setup, you are covered. Browse the full Levitator support system and find the right kit for your rig today.
Sources and further reading
- RV sewer hose freeze temperature: Q&A — freeze thresholds and pooling risk guidance
- How to Prevent Frozen RV Pipes: Winter Plumbing Checklist — system-first prevention framework and valve habits
- iRV2 forum: what temp will a sewer hose freeze — experienced RVer consensus on disconnect-and-store best practice
- RV Dump Station Winter Guide — heated hose options, foam insulation limits, and safe thawing procedures
- RVZone: how to keep RV sewer hose from freezing — plastic degradation and sleeve protection
- RVing Know How: best heated sewer hoses for RVs — heated hose product overview and temperature ratings
- Rvlevitator: RV hose maintenance best practices — seasonal inspection and maintenance routines
- Water intrusion in motorhomes — exterior hose protection and environmental damage prevention
This article is general information, not professional advice. Confirm campground pedestal capacity, local regulations, and manufacturer specs with the relevant primary sources before relying on any active heating solution.
Leave a Reply