
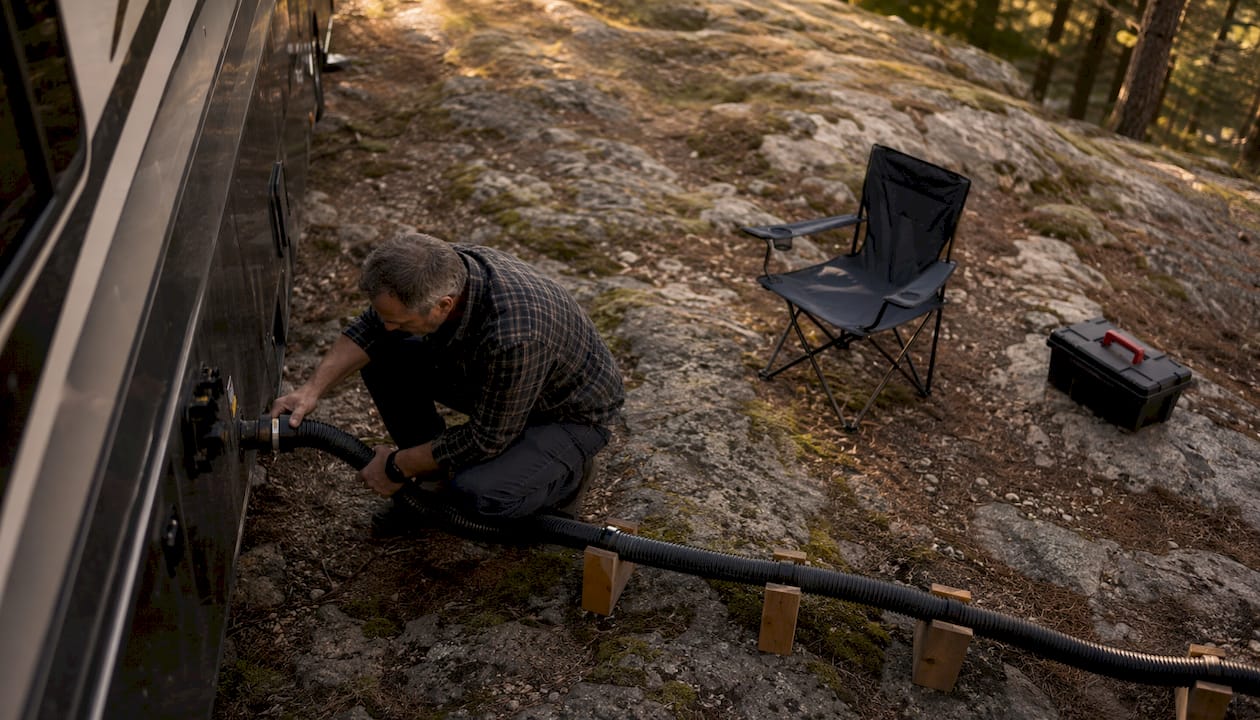
When the campground sewer inlet sits higher than your RV outlet, gravity stops working for you. The good news: you have three reliable options to get waste flowing correctly.
- Create a stair-step slope. Use leveling blocks or hose supports to drop the hose height every 1–2 feet from your RV outlet toward the sewer inlet, maintaining a continuous downhill slope the whole run.
- Use a portable macerator pump. A 12V macerator grinds waste and pushes it uphill up to 100 feet through a 1-inch hose, bypassing gravity entirely.
- Walk the hose manually. For minor elevation differences, lift the hose at the RV end and walk the arch toward the sewer inlet to push waste through. This clears the hose but does not drain the tank itself if the inlet is significantly higher.
- Keep your black tank at least two-thirds full. Adequate fluid volume creates a surge effect that helps waste move through the hose, especially on uphill runs.
Pro Tip: Before you open any valve, fill the black tank with enough water so it reads at least two-thirds full. That fluid weight generates the momentum your waste needs to push through an uphill or complex hose run.
Why does sewer outlet height affect RV drainage so much?
Your RV sewer system runs entirely on gravity. There is no built-in pump forcing waste out of the tanks. When you open the black tank valve, waste flows downhill through the outlet, into the sewer hose, and toward the campground connection. The moment any section of that hose runs flat or uphill, flow stalls.

A kinked or sagging hose creates low spots where waste pools instead of draining. Solids settle, liquids back up, and you end up with slow draining, odors, and a messy disconnect. The problem gets worse the longer the hose run.
Several factors combine to make uphill connections especially difficult:
- Elevation difference. Even a few inches of height at the sewer inlet can stop gravity flow completely.
- Hose length. A longer hose has more opportunity to sag, creating multiple low spots.
- Hose sags and kinks. Any dip in the hose traps waste and creates an airlock that blocks flow.
- Insufficient water in the tank. Solids without liquid cannot move, even on a perfect downhill slope.
- Flat hose sections. A hose lying on level ground has no slope to drive flow toward the inlet.
The result of ignoring these factors is predictable: waste pools in the hose, solids dry out, and you face clogs, sensor errors, and odors that linger long after you leave the campsite. Understanding this is the first step toward fixing it.
How do you fix an uphill sewer hose connection at a campsite?
The core goal is simple: create a continuous downhill path from your RV outlet to the sewer inlet, with no dips, no flat sections, and no uphill segments anywhere along the run.
Build a stair-step support system
Place your first hose support directly under the RV outlet at its highest point as explained in our step-by-step setup guide. Then drop one block every 1–2 feet of hose run toward the sewer inlet, stepping the height down gradually. The target grade is roughly 1/8 to 1/4 inch of drop per foot of hose. Accordion-style hose supports work well here because you can adjust each section independently to match uneven ground.

A vinyl rain gutter section is a practical DIY alternative. Rest the hose inside a 10-foot gutter, support it on blocks every 2–3 feet, and step the whole trough downhill toward the inlet. It keeps the hose rigid and prevents sags even on bumpy terrain.
Walk the hose when elevation is minor
The “walking the hose” technique works when the elevation difference is small. Open the black tank valve and wait for the tank itself to drain fully. Then lift the hose at the RV end to about waist height and walk the arch toward the sewer inlet, pushing the remaining waste through. Repeat as needed, then do the same with the gray tank. Rinsing the gray tank last helps flush residue out of the hose.
Keep in mind that walking the hose only clears waste already in the hose. If the sewer inlet is significantly higher than the tank outlet, the tank itself will not drain without a pump.
Safe hookup and disconnection steps
- Put on disposable gloves before touching any fittings.
- Attach the hose to the RV outlet first, confirm the twist-lock fitting is fully seated.
- Run the hose to the sewer inlet and secure it with a rubber donut or threaded adapter.
- Check the full run for sags before opening any valve.
- Open the black tank valve first, then the gray tank valve to rinse the hose.
- Close all valves completely before disconnecting.
- Cap the hose ends immediately after removal.
Pro Tip: A clear elbow adapter between your hose and the sewer inlet lets you watch the flow in real time. You will know exactly when the tank is empty and when the rinse water runs clear, so you never guess.
How do macerator pumps let you dump RV tanks uphill?
A macerator pump is a 12V electric device that connects directly to your RV’s drain outlet. It grinds solid waste into a fine slurry and then pumps that slurry through a smaller hose under pressure. Because it creates its own force, it does not need a downhill slope to move waste.
Portable macerator units can push waste uphill up to 100 feet through a 1-inch discharge hose. That makes them the go-to solution when the campground sewer inlet is simply too high for any block or support system to overcome. Many experienced RVers carry one as a backup even when they rarely need it.
Pros and cons of macerator pumps
Advantages:
- Pumps waste uphill regardless of elevation difference
- Uses a 1-inch hose, which is easier to handle and store than a standard sewer hose
- Works at sites where gravity drainage is impossible
- Keeps the process contained and relatively clean
Limitations:
- Requires a 12V power source
- Slower than gravity dumping for large tanks
- Can clog if overloaded with too much solid matter at once
- Some campgrounds restrict their use, so check park rules first
Preventing macerator clogs
The 1-inch discharge hose that macerators use is narrower than a standard sewer hose, so overloading it is a real risk. Run the pump with adequate water in the tank so waste flows as a slurry rather than a thick sludge. Avoid flushing non-biodegradable wipes, paper towels, or large debris into the black tank. After pumping, run clean water through the system to flush the macerator housing and discharge hose.
For ongoing reliability, check the pump’s impeller and housing periodically for buildup. A well-maintained macerator lasts for years of regular use. For more on optimizing uphill waste flow, the techniques that work with gravity and those that work against it follow the same core principle: keep waste moving as a liquid, not a solid.
Why does black tank water level matter so much for uphill dumping?
Water is the working fluid of your RV sewer system. Solids do not move on their own. They need liquid to carry them through the outlet, into the hose, and toward the sewer connection. On an uphill run, this becomes even more critical because there is no gravity assist to compensate for a dry, sluggish tank.

Maintaining your black tank at least two-thirds full before dumping gives waste enough fluid weight to generate a surge when you open the valve. That surge is what pushes solids through the outlet and into the hose. Without it, solids settle near the drain and dry out, creating the “poop pyramid” blockage that forms directly above the outlet pipe.
A black tank without adequate water produces nearly solid waste that will not flow uphill under any circumstances. Even a macerator pump struggles when the tank contents are too thick to move freely. The fix is straightforward: add water before you dump, not after.
Best practices for black tank water management
- Keep the black tank valve closed at all times except when actively dumping.
- Add at least a gallon of water after every flush to maintain liquid volume.
- Dump only when the tank is sufficiently full, ideally two-thirds or more.
- Use an RV-safe tank treatment to break down solids and control odor.
- After dumping, add fresh water and treatment before the next use.
- Flush the black tank with a built-in rinse port or backflush elbow until water runs clear.
Pro Tip: If you are staying at a full hookup site for several days, resist the urge to leave the black tank valve open. Liquids drain away continuously, leaving solids to dry and pile up. Keep the valve closed, dump periodically, and your tank will stay clean and flow-ready.
Proper water management also protects your macerator pump. A well-hydrated tank produces a slurry that the pump handles easily. A dry, compacted tank can stall the impeller and cause damage. For a deeper look at why RV waste drains slowly and how to fix it, water volume is almost always the first variable to address.
How does Rvlevitator’s hose support system handle uneven terrain?
Generic block systems work, but they have real limitations on uneven ground. Blocks shift, hose sections sag between supports, and you spend more time adjusting than camping. Rvlevitator’s hose support gear is built specifically to solve these problems on terrain where standard accordion supports fall short.
The Rvlevitator system creates a continuous slope on uneven terrain without the pitch issues or hose wear that come with traditional block setups. The design holds the hose at a consistent angle regardless of what the ground underneath is doing. That means no low spots, no pooling, and no guessing whether your slope is correct.
Setup is fast. You do not need tools, and the system is compatible with standard RV sewer hoses. It also protects the hose from ground contact, which extends hose life by reducing abrasion from rocks, debris, and moisture. Rvlevitator backs the product with a money-back guarantee, so you can try it on your next trip with no risk.
For RVers who camp frequently on uneven or hilly sites, upgrading from DIY blocks to a purpose-built sewer hose support kit pays off quickly in time saved and messes avoided.
Pro Tip: When setting up on a hill, place the Rvlevitator support with the highest point directly under your RV outlet and let the system step down naturally toward the sewer inlet. You get the correct slope without measuring or stacking blocks by hand.

Rvlevitator’s hose support options are designed for RVers who want a reliable, repeatable setup every time, whether the ground is flat, sloped, or somewhere in between.
Key Takeaways
Managing RV waste connections on hills requires a continuous downhill hose slope, adequate black tank water volume, and the right equipment to handle elevation differences that gravity alone cannot overcome.
| Point | Details |
|---|---|
| Maintain continuous downhill slope | Drop hose height every 1–2 feet from RV outlet to sewer inlet to keep waste flowing. |
| Use a macerator pump for true uphill runs | A 12V portable macerator pumps waste uphill up to 100 feet through a 1-inch hose. |
| Keep black tank at least two-thirds full | Higher water levels create the surge effect that carries solids through the outlet and hose. |
| Prevent macerator clogs | Run the pump with adequate water in the tank and avoid flushing non-biodegradable materials. |
| Upgrade to purpose-built hose supports | Rvlevitator’s support system holds a consistent slope on uneven terrain without block shifting. |
The real reason uphill RV sewer connections keep catching people off guard
Most RVers understand gravity drainage in theory. What catches them off guard is how little elevation difference it takes to stop flow completely. A sewer inlet that sits just a few inches above the RV outlet is enough to stall drainage, and many campgrounds, especially older parks with fixed concrete pedestals, have exactly that setup.
The solutions have been available for years. Macerator pumps, stair-step supports, and proper water management are not new ideas. What is new is the quality and accessibility of purpose-built equipment that makes these solutions practical for everyday RVers rather than just full-timers with a truck full of tools.
Water management is the piece most guides underemphasize. You can have a perfect hose slope and still struggle to drain if the black tank is running dry. The fluid volume is what moves waste, not the slope alone. Getting that ratio right before you open the valve changes the whole experience.
The other overlooked factor is maintenance. A macerator pump that never gets flushed, a hose that never gets rinsed, and a black tank that never gets a proper flush cycle will all fail at the worst possible moment. Proactive care, not reactive fixes, is what keeps uphill connections manageable. Checking your hose maintenance practices before each trip takes minutes and prevents hours of frustration at the campsite.
RVers who camp on varied terrain regularly should treat a quality hose support system and a portable macerator as standard equipment, not optional accessories. The campgrounds worth visiting are rarely the ones with perfectly level, perfectly positioned sewer inlets.
Recommended
- RV Waste Hose Flow Optimization: A 2026 Guide
- RV Waste Drainage Best Practices for Cleaner Trips
- RV Dump Station Hose Setup: Your 2026 Guide
- RV Backflow Preventer –
Tired of fighting your sewer hose setup? The Levitator suspends your hose above any terrain: no sags, no pooling, no smell. See how it works or shop the lineup.