
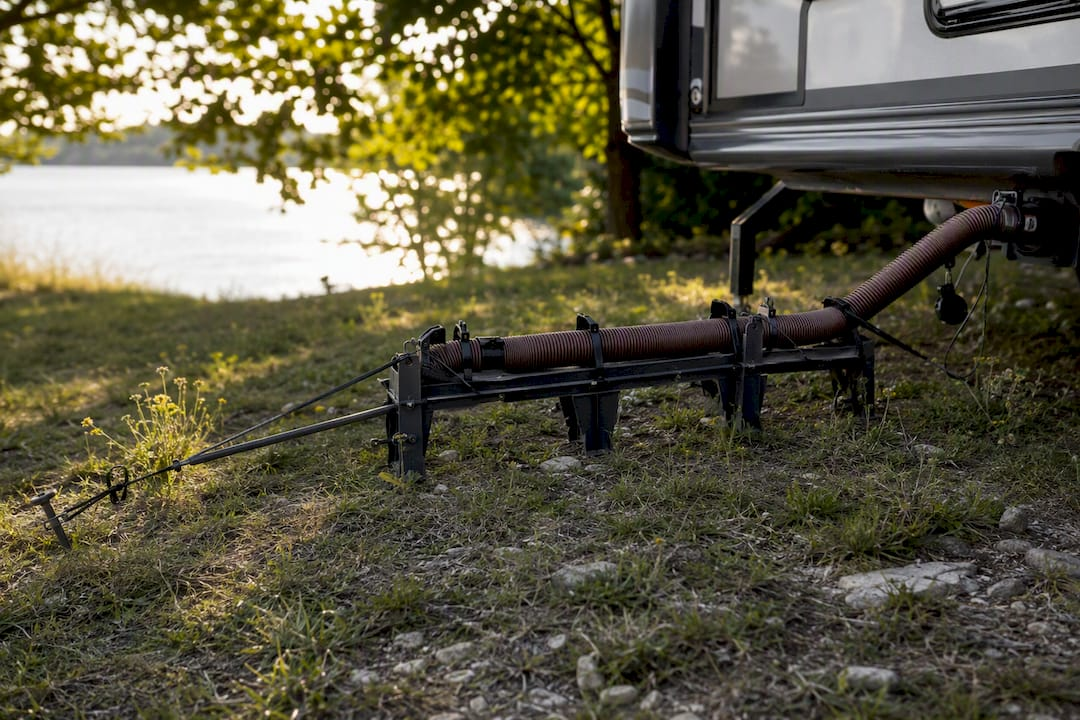
Your sidewinder is probably not draining because of a low sag point, a kink, or a blocked bayonet fitting, and most of the time you can get flow moving again in under 10 minutes. Grab nitrile gloves before you touch anything. Raise or re-tension the support so the hose runs downhill the whole way. Then check the clear elbow at the dump inlet to confirm waste is actually moving.
- Put on nitrile gloves before touching hose or fittings
- Lift the sagging section and re-tension the support line
- Watch the clear elbow for flow; no movement means a clog, not a sag
Pro Tip: The RV Industry Association recommends about 1/8 inch of drop per foot, roughly a 1 to 2 percent grade. If your support can’t hold that slope on uneven ground, a permanent fix like the Levitator solves it once instead of every trip.
Key Takeaways
A sidewinder that won’t drain is almost always a slope, sag, or clog problem, and each has a specific, fast fix.
| Point | Details |
|---|---|
| Diagnose in minutes | Check the clear elbow first; flowing water means the clog is downstream, not at the support. |
| Match slope target | Keep about 1/8 to 1/4 inch of drop per foot using shims or blocks on uneven ground. |
| Space supports correctly | Place a support every 5 to 6 feet, with at least three on a 20-foot hose run. |
| Know your cost bands | DIY fixes run $0 to $80; full replacement runs $80 to $250 depending on parts. |
| Fix it permanently | The Levitator tension-line support holds slope automatically on uneven terrain and includes a money-back guarantee. |
Table of Contents
- Why Is My Sidewinder Not Draining? A 10-Minute Checklist
- Common Reasons A Tension-Line Support Won’t Drain
- How Do You Fix Each Cause?
- How Do You Set Up A Support So It Won’t Sag Again?
- Why The Levitator Solves This For Good
- Should You Repair Or Replace Your Sewer Hose Support?
- What I’ve Learned Writing About RV Drainage
- Ready To Stop Fighting Your Sewer Hose?
- Frequently Asked Questions
- Sources
Why Is My Sidewinder Not Draining? A 10-Minute Checklist
Run through this before you assume the worst. Most sidewinder drainage problems trace back to one of five things, and you can rule them out fast.
- Gloves on (15 seconds): sewage splash is not worth skipping this step
- Look at the clear elbow (30 seconds): flowing water means the blockage is downstream of that point
- Tug-test the bayonet fitting (30 seconds): a loose connection lets air in and kills the siphon effect
- Re-tension the support line (60 to 90 seconds): eliminate any low belly where waste can pool
- Scan the hose for kinks or a collapsed section (60 seconds): flashlight helps in low light
Tools needed: nitrile gloves, pliers, a bucket, and a flashlight. If you have run every step and still have zero flow after the black valve is open, stop troubleshooting and treat it as a clog deeper in the tank or termination assembly. A structured diagnosis flow that checks the cap, valve stroke, slope, and vents in sequence catches the failures a quick glance misses.
Common Reasons A Tension-Line Support Won’t Drain
Tension-line supports fail in predictable ways once you know what to look for.
- Sag or “belly” in the hose run: even a few inches of dip lets waste pool instead of flowing downhill
- Improper overall slope: a site that looks flat can still be a hair uphill in spots, which is enough to stop gravity flow
- Kinks or a collapsed hose section: cheap hose walls fold under their own weight when unsupported
- Popped elbow fittings or a clogged bayonet: debris or a loose seal blocks the exit point
- Damaged support hardware: a slipped tension line, torn sleeve, or collapsed foot on soft ground
Pro Tip: A sag shows itself as a visible low point in the hose with waste sitting still. A clog looks different: no flow anywhere, even when the slope looks fine and the support is holding steady. If lifting the middle of the hose doesn’t get things moving, you’re dealing with a blockage, not a sag.
How Do You Fix Each Cause?
Match the fix to the failure, and don’t skip the safety basics.
- Eliminate sag: re-tension the support line, add a shim or block under a low foot, and shorten the hose run where possible. Reposition supports every 5 to 6 feet so no section droops between anchor points.
- Clear a clog: confirm the blockage with the clear elbow, then run several gallons through the system. A tank flush wand or a gray-water backflush, lifting the hose midpoint while gray water still flows, rinses residual solids stuck in the termination assembly.
- Secure loose fittings: tug-test the bayonet connection, reseat the clear elbow, and add a locking adapter if the inlet keeps working loose on its own.
- Follow the safe dump order: connect to the dump inlet first, then the RV outlet. Pull the black valve, then the gray, so rinse water flushes the hose on its way out.
Stand uphill of every connection point while you work, and never lean over an open bayonet. Most of this is a five to fifteen minute DIY job costing nothing. Replacement parts, a new elbow or sleeve, run $0 to $80. A full support or hose replacement lands in the $80 to $250 range depending on length and material.
How Do You Set Up A Support So It Won’t Sag Again?
Getting the installation right the first time beats troubleshooting every weekend.
- Space supports every 5 to 6 feet along a 15 to 25 foot run; a 20-foot hose needs at least three contact points
- Start high, right under the RV outlet, so the whole run slopes downhill from the start
- Target 1/8 to 1/4 inch of drop per foot, and use leveling blocks or rocks under support feet on uneven campsites
- Inspect the vinyl sleeve each season for UV cracking or brittleness, and check anchor points for wear
- Before every trip: eyeball the slope. After every dump: rinse with a dedicated rinse hose and store the hose dry
Pro Tip: Raising the hose start point under your RV outlet by just two inches often fixes stubborn, nearly-flat sites without buying new gear. Try that before you assume your site is unworkable.
Why The Levitator Solves This For Good
Temporary fixes like stacked blocks or accordion supports work until the ground shifts or the sag comes back. The Levitator tension-line support is built to hold a consistent downhill pitch regardless of what the campsite looks like underneath your rig.
- UV-resistant vinyl sleeve protects the hose from sun damage and abrasion, extending its life beyond a bare hose
- Universal hose compatibility means it works with the setup you already own
- Anchors under the RV outlet and holds tension across the full run, so there’s no low belly to create a clog in the first place
Installing it takes minutes: clip it under the outlet, extend the tension line toward the dump inlet, and adjust for slope using the built-in adjustability instead of hunting for rocks. Levitator backs the product with a money-back guarantee and compensates customers for their feedback, which tells you the company expects it to outperform whatever setup you’re replacing. For gravel pads, sloped sites, or soft ground, it beats ramps or stacked blocks because it doesn’t need re-leveling every time you move the rig.
Pro Tip: If you’re resetting up the same three cinder blocks every weekend, that’s the sign you’ve outgrown temporary fixes and need something built for uneven terrain.
Should You Repair Or Replace Your Sewer Hose Support?
A torn sleeve, one loose anchor, or a replaceable clip is a repair job. A cracked hose wall, a collapsed support frame, or the same clog coming back trip after trip means it’s time to replace.
| Point | Details |
|---|---|
| DIY fix | $0 to $80, minutes to complete, covers re-tensioning and minor clog clearing |
| Parts or repair | $0 to $80, covers new sleeves, elbows, or bayonet adapters |
| Full replacement | $80 to $250, covers a new support system or hose |
Check for hidden damage before you decide: UV cracking on the underside of the sleeve, internal wear you can’t see from outside, or a support foot that’s lost its grip. If the same failure happens on three separate trips, stop patching it and call it what it is: a design problem your current setup can’t solve.

What I’ve Learned Writing About RV Drainage
After putting together detailed guides on RV black tank drainage basics and waste-flow optimization, the pattern is consistent: most “clog” complaints are actually slope problems in disguise. If you’re troubleshooting the same sag every weekend, buy a dedicated support built for uneven ground instead of re-engineering blocks each time.
Ready To Stop Fighting Your Sewer Hose?
Cinder blocks, pool noodles, and bent coat hangers all promise a quick fix, but they need resetting every time you park somewhere new. The Levitator sewer hose support holds a steady downhill pitch on gravel, dirt, or sloped pads without you crawling around adjusting blocks before every dump.

Every kit ships with the UV-resistant vinyl sleeve built in, so you’re not buying hose protection separately. Levitator backs it with a money-back guarantee and pays customers for honest feedback, which is a low-risk way to try it against whatever you’re using now. Browse the full lineup of sewer hose supports or go straight to the uneven-terrain model if your campsite never sits level.
Frequently Asked Questions
Why is my sidewinder not draining even though it looks level?
A site can look flat while still holding a slight uphill section somewhere along the run. Even a half-inch rise breaks gravity flow, so re-check with the clear elbow before assuming the slope is fine.
How do I unclog a sidewinder without special tools?
Run several gallons of water through the hose while watching the clear elbow, then try a gray-water backflush by briefly lifting the hose midpoint while gray water is flowing. That dislodges most residual solids stuck near the termination assembly.
My sidewinder is too short for the distance to the dump inlet. What now?
Add an extension section rated for the same hose diameter, and add an extra support point to maintain the same 5 to 6 foot spacing across the longer run. Don’t stretch a single hose section past its support limit.
Can a sidewinder pump issue actually be a slope problem?
Yes. What looks like a pump or valve failure is frequently a low belly or a section running uphill by an inch or two. Rule out slope before assuming hardware failure.
When should I stop troubleshooting and buy a new support?
If the same drainage problem returns on three or more trips despite fixes, the support itself has likely outlived its usefulness. A permanent tension-line system built for uneven ground removes the guesswork going forward.

Sources
These sources cover the slope math, dump order, and diagnostic steps referenced throughout this guide.
- Best RV Sewer Hose Guide (2025)
- RV Sewer Hose Setup Done Right – KhabarJob
- What to Do When the Campground Sewer Hookup Is Higher Than Your RV Outlet (Uphill Sewer Hose Fixes) – HAPPY CAMPERS
- Engineerskill
- RV Black Tank Not Draining: Causes & Fixes
Campground rules vary on macerator pump use and gray-water disposal, so check your park’s posted policies before improvising a fix.
Leave a Reply