
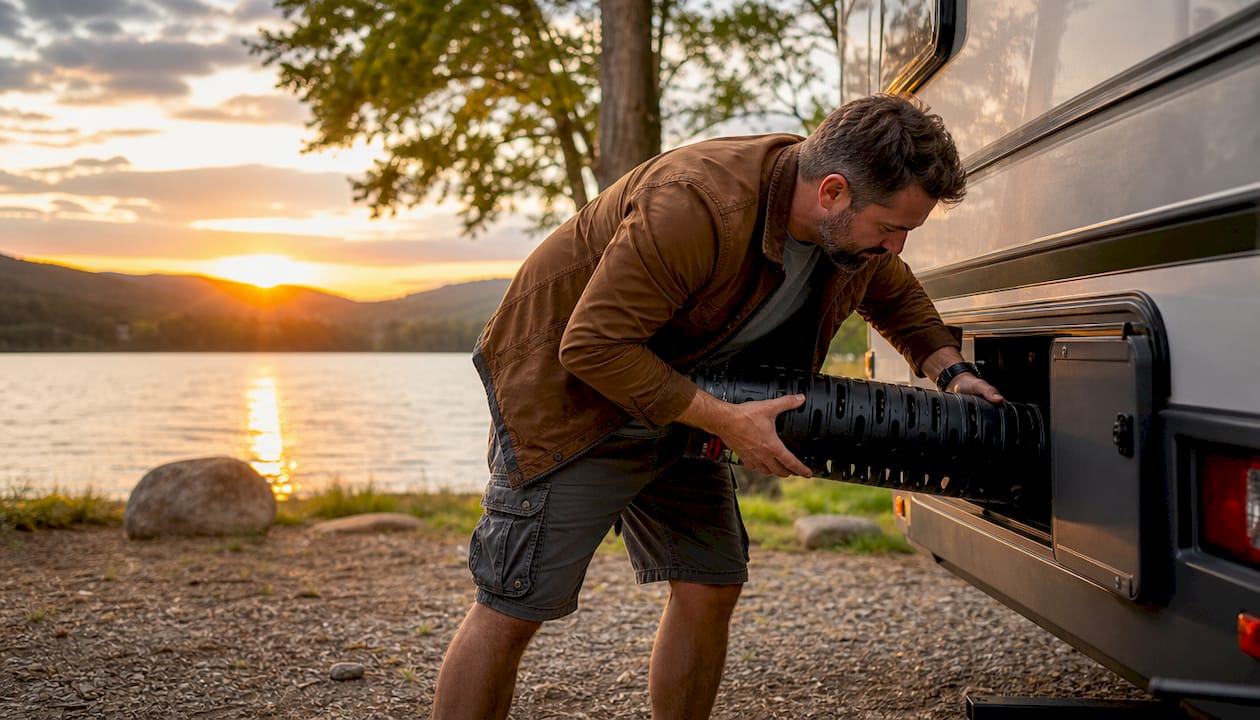
Proper RV hose storage between trips is defined as the dedicated, hygienic containment of sewer hoses in a ventilated, isolated compartment away from fresh water lines and living areas. Skipping this step creates real problems: bacterial growth inside the hose, persistent odors that seep into your RV, and accelerated wear from UV exposure and physical damage. A well-mounted storage system protects hoses from UV damage, heat, and kinks, extending hose lifespan well beyond average expectations. The good news is that getting this right does not require expensive gear. It requires the right approach.
What are the essential requirements for RV sewer hose storage?
Effective sewer hose storage rests on four non-negotiable requirements: isolation, ventilation, accessibility, and durability. Get all four right, and your hose stays clean, odor-free, and ready to deploy at the next campsite.
Isolation from other gear
Never store sewer hoses with fresh water hoses or food supplies. Residual waste moisture on a sewer hose can contaminate anything it contacts. Failing to dedicate an external storage compartment for sewer hoses is the quickest way to bring contamination into your living space. The storage location must be completely separate, ideally outside the RV cabin in a dedicated exterior compartment or mounted carrier.

Ventilation to prevent odors
Airtight enclosures trap moisture and accelerate odor buildup. Ventilated storage tubes with vent holes at both ends promote drying and prevent that familiar sewer smell from building up between trips. The best way to prevent odor in storage is to enable a cross-breeze through vent hole placement, not to seal everything shut and hope for the best.
Accessibility and durability
Your storage solution should let you grab the hose quickly without wrestling with latches or digging through other gear. UV protection matters too. Direct sun degrades standard sewer hose material faster than most RV owners expect. Look for carriers or containers that shield the hose from sunlight and secure it against road vibration.
Key requirements at a glance:
- Complete isolation from fresh water hoses and food supplies
- Ventilated container with holes at both ends (not airtight)
- Easy access for quick deployment and post-trip cleanup
- UV-resistant material or coating on the storage carrier
- Secure mounting to prevent movement on rough roads
Pro Tip: Label your sewer hose storage compartment clearly. If you travel with others or rent your RV, a simple label prevents anyone from accidentally mixing sewer and fresh water gear.
How to select the best storage solution for your RV sewer hose

The right storage option depends on your RV’s design, your hose type, and how much you want to spend. Each method has real trade-offs worth knowing before you commit.
Bumper storage tubes
Many travel trailers include hollow rear bumpers sized to hold a standard sewer hose. This is the most convenient option because the storage is built in and adds no extra weight or hardware. The catch: bayonet-style fittings sometimes need to be rotated to fit inside a standard 4-inch bumper tube. Heavy-duty Rhino-style hoses with bulky bayonet ends may not fit at all, even with proper orientation. If your hose fittings are oversized, bumper storage is not your best option.
Under-chassis mounts
Mounting a carrier under the RV chassis keeps the hose completely out of sight and frees up bumper space. This method works well for motorhomes and fifth wheels that lack hollow bumpers. The critical rule: bolt the carrier to the steel frame, not to the underbelly coroplast material. Mounting to weak coroplast leads to failure on rough roads. Steel frame attachment holds firm regardless of terrain.
Lidded buckets and plastic totes
A lidded 5-gallon bucket or heavy-duty plastic tote costs around $20–$30 and gives you a flexible, budget-friendly option. You can store the hose coiled inside, add a few small vent holes to the lid, and tuck it into an exterior storage bay. This approach works for any hose size and requires zero installation. The downside is that it takes up bay space and is less organized than a dedicated tube carrier.
DIY PVC pipe carriers
PVC pipe carriers cut to a custom length and painted for UV protection give you a purpose-built solution at low cost. You cap one end, add vent holes, and mount the pipe along the RV frame. This method suits RV owners who want a clean, permanent setup without paying for a commercial product. The trade-off is the time and tools required to build and mount it correctly.
Pro Tip: When using a PVC carrier, drill vent holes at both ends and angle the tube slightly downward so any residual moisture drains out rather than pooling inside.
| Storage method | Cost range | Best for | Key limitation |
|---|---|---|---|
| Bumper tube | $0 (built-in) | Travel trailers with hollow bumpers | Oversized fittings may not fit |
| Under-chassis mount | $30–$80 | Motorhomes, fifth wheels | Must bolt to steel frame only |
| Lidded bucket or tote | $20–$30 | Any RV, flexible use | Takes up exterior bay space |
| DIY PVC carrier | $15–$40 | Custom length needs | Requires tools and installation time |
How do you store and maintain your sewer hose between trips?
Proper storage starts the moment you disconnect at the dump station. Skipping any step in the process creates the odor and contamination problems you are trying to avoid.
- Rinse thoroughly at the dump station. Run water through the hose until it runs completely clear. Residual waste left inside is the primary source of odor during storage.
- Drip-dry before storing. Hold the hose upright or hang it briefly to let water drain from both ends. Storing a wet hose in an enclosed carrier traps moisture and encourages mold.
- Cap both ends. Sealing hose ends male-to-female after rinsing creates a closed loop that blocks insects and dirt from entering during storage. This single step prevents a surprising amount of contamination.
- Place the hose in your ventilated carrier. Do not force it into a tight space. Kinking the hose during storage weakens the material and shortens its life.
- Inspect your storage system regularly. Check the hose and storage container every 3–6 months or after each trip for cracks, worn seals, and odor buildup. Catching a small crack early prevents a messy failure at the campsite.
- Clean the storage compartment itself. Wipe out the carrier or bucket with a diluted bleach solution a few times per season. Odor buildup inside the container transfers back to the hose.
Sealing hose ends after every rinse and storing in a ventilated, dedicated compartment are the two habits that separate RV owners who replace hoses every season from those who get years of reliable use from the same hose.
Pro Tip: Keep a small spray bottle of diluted white vinegar in your hookup kit. A quick spray inside the hose ends before capping neutralizes residual odor without damaging the hose material.
For more guidance on DIY RV maintenance, including how to inspect your sewer system before and after trips, Rvlevitator has a practical resource worth bookmarking.
What mistakes do RV owners make with sewer hose storage?
Most storage failures come from a handful of repeated errors. Knowing them in advance saves you from a messy, expensive lesson on the road.
- Storing with fresh water hoses or food supplies. This is the most common and most dangerous mistake. Even a rinsed sewer hose carries enough residual bacteria to contaminate anything stored nearby. Always use a completely separate compartment.
- Ignoring hose fitting size before choosing a storage tube. Standard 4-inch bumper tubes do not fit every hose. Forcing an oversized bayonet fitting damages both the hose and the bumper. Measure your fittings before committing to bumper storage.
- Mounting carriers to coroplast underbelly material. Coroplast is the lightweight plastic sheeting used on many RV underbellies. It cannot support the weight of a loaded hose carrier on rough roads. All mounts must connect directly to the steel chassis frame.
- Sealing the storage tube airtight. A sealed tube traps moisture and concentrates odor. Properly ventilated storage reduces mold and odor and improves hose longevity. Always include vent holes.
- Skipping regular inspection. A hose that looks fine from the outside can have internal cracks or worn end seals. Skipping the 3–6 month inspection cycle means you often discover the problem mid-trip, not before it.
Addressing these mistakes does not require expensive upgrades. Most fixes cost nothing but attention. The role of hose storage in RV travel goes beyond convenience. It directly affects sanitation, equipment life, and your peace of mind on every trip.
Key Takeaways
Dedicated, ventilated sewer hose storage that isolates the hose from fresh water gear and includes regular inspection is the single most effective way to extend hose life and prevent contamination between trips.
| Point | Details |
|---|---|
| Isolation is non-negotiable | Store sewer hoses completely separate from fresh water hoses and food supplies at all times. |
| Ventilation prevents odor | Use containers with vent holes at both ends; never seal storage airtight. |
| Cap hose ends after rinsing | Sealing male-to-female after each rinse blocks insects and dirt during storage. |
| Mount only to steel frame | Under-chassis carriers must bolt to the steel frame, not to coroplast underbelly material. |
| Inspect every 3–6 months | Check hose and storage container after each trip or at least twice per season for cracks and worn seals. |
What I’ve learned from years of watching RV owners get this wrong
Most RV owners treat sewer hose storage as an afterthought. They rinse the hose, toss it in a bag, and move on. That habit costs them a new hose every season and the occasional unpleasant surprise at the dump station.
The RV owners who get the most life from their hoses share one trait: they treat the storage step as part of the trip, not a chore after it. Rinsing thoroughly, capping both ends, and placing the hose in a ventilated carrier takes less than five minutes. That five minutes pays for itself many times over.
I have also seen a lot of DIY storage solutions that look clever but fail on the road. Coroplast mounts, grocery bags, and shared compartments with fresh water gear are the most common culprits. The fix is always the same: dedicate a proper space, ventilate it, and inspect it regularly.
Investing in a quality carrier or support system is not about spending more money. It is about spending it once instead of repeatedly replacing gear that failed because of poor storage habits. The hose you protect between trips is the hose that works reliably when you need it.
— Rvlevitator
Rvlevitator’s solutions for cleaner RV hose storage
Rvlevitator builds products specifically for RV owners who want reliable, clean sewer hose management without the guesswork of DIY fixes.

The Rvlevitator lineup includes hose covers and sewer hose supports designed to protect your hose from UV exposure, physical damage, and environmental wear between trips and during use. Each product is built for quick installation and works across a range of hose sizes and RV configurations. Rvlevitator backs every product with a money-back guarantee, so you can try it on your rig with zero risk. If you want gear that holds up trip after trip, start with the right support system.
FAQ
What is the best way to store an RV sewer hose between trips?
Rinse the hose until water runs clear, cap both ends male-to-female, and store it in a ventilated carrier or dedicated exterior compartment completely separate from fresh water hoses. Avoid airtight enclosures.
How often should I inspect my RV sewer hose and storage system?
Inspect both the hose and its storage container every 3–6 months or after each trip, checking for cracks, worn seals, and odor buildup.
Can I store my sewer hose in the RV bumper?
Yes, if your bumper is hollow and your hose fittings fit inside the tube. Rotate bayonet fittings to align with the tube opening. Oversized fittings on heavy-duty hoses may require an alternative storage method.
Why does my stored sewer hose still smell bad?
Airtight storage traps moisture and concentrates odor. Add vent holes to both ends of your storage container and rinse the hose more thoroughly before storing. Wiping the container with a diluted bleach solution also helps.
Is it safe to store a sewer hose in the same compartment as other RV supplies?
No. Sewer hoses must be stored in a completely separate, dedicated compartment. Residual bacteria and moisture can contaminate fresh water hoses, food supplies, and other gear stored nearby.
Recommended
- Why Every RVer Should Use a Sewer Cover to Protect Their RV Sewer Hose –
- Levitator Blog –
- Hose Covers –
Tired of fighting your sewer hose setup? The Levitator suspends your hose above any terrain: no sags, no pooling, no smell. See how it works or shop the lineup.
One response to “RV Hose Storage Between Trips: Keep It Clean”
[…] hose and connector hygiene when filling large containers, the same principles that apply to RV water system maintenance work well: dedicated food-grade hoses, capped when not in use, stored […]