
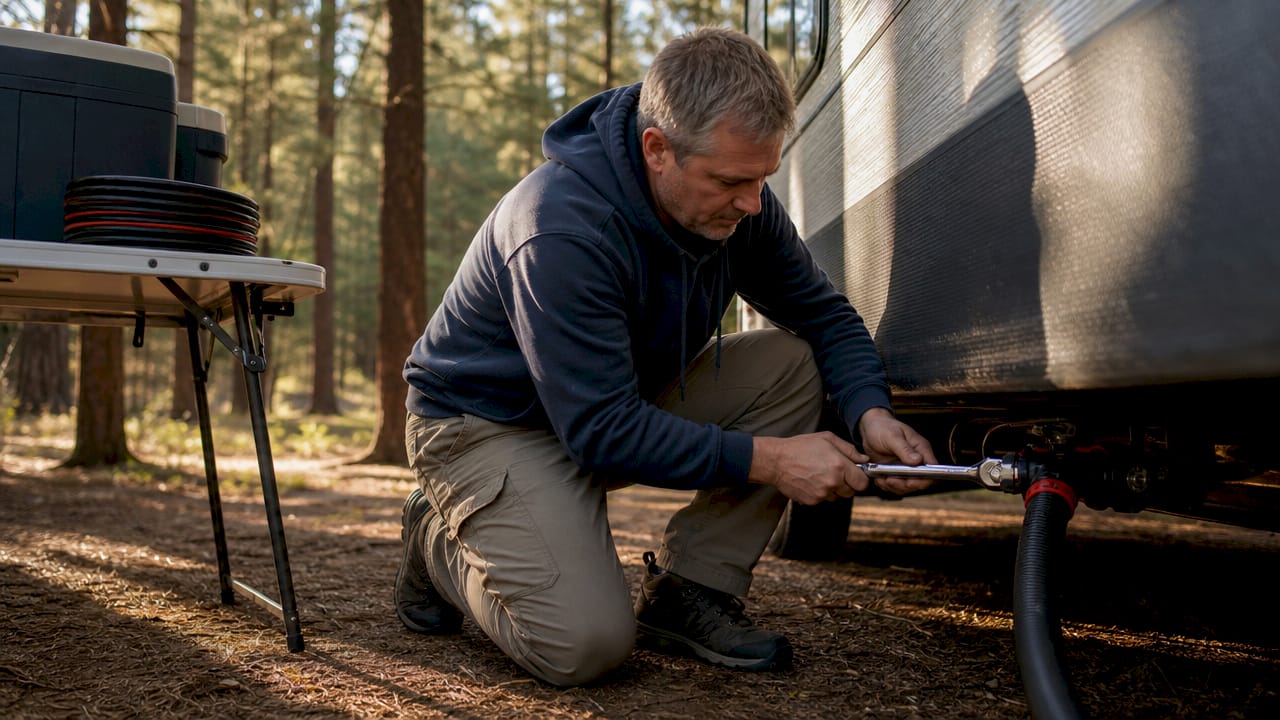
RV sewer hose torque is defined as the controlled twisting force you apply to sewer hose fittings to create a secure, leak-free connection during waste disposal. Unlike plumbing in a house, RV sewer connections rely on hand-applied torque rather than pipe wrenches or power tools. Getting this right protects you from spills, damaged fittings, and costly repairs. This guide covers what torque means in this context, typical values by fitting type, best practices for tightening, and how to keep your connections reliable trip after trip.
What is RV sewer hose torque, and why does it matter?
RV sewer hose torque is the rotational force you apply when twisting a sewer hose fitting onto a connection point. The goal is not raw strength. The goal is compressing the rubber gasket inside the fitting just enough to form a watertight seal.
Most RV sewer hose fittings fall into two categories: threaded fittings and bayonet fittings. Threaded fittings screw onto a matching thread at the RV outlet or dump station inlet. Bayonet fittings use a quarter-turn locking mechanism that clicks into place. Each type requires a different amount of force, and applying the wrong amount causes problems in both directions.

There is no universal industry standard for RV sewer hose torque. That means you cannot look up a single number and apply it to every rig. Manufacturer specs vary by fitting material, gasket type, and connection design. Understanding the general ranges and the principles behind them is what keeps you out of trouble.
What are typical torque values by fitting type?
Guides suggest 10–15 ft-lbs for threaded connections and 5–10 ft-lbs for bayonet fittings. Those numbers give you a useful reference point, but they are not absolute rules.
The table below summarizes the general ranges and what happens when you go outside them.
| Fitting type | Recommended torque range | Risk of under-tightening | Risk of over-tightening |
|---|---|---|---|
| Threaded (plastic NPT) | 10–15 ft-lbs | Leaks at the gasket | Cracked fitting or stripped threads |
| Bayonet (quarter-turn) | 5–10 ft-lbs | Fitting pops loose | Damaged locking tabs |
| Slip-fit with clamp | Hand-tight plus clamp | Hose slides off | Clamp cuts into hose |
Over-tightening is the more common mistake. Plastic fittings crack under metal tool pressure, and stripped threads cannot hold a seal. Under-tightening leaves the gasket uncompressed, which means waste leaks around the joint.
Pro Tip: If you do not own a torque wrench, use the count-the-turns method. For plastic NPT fittings, 3 to 4.5 turns past hand-tight is more reliable than guessing at ft-lbs, because manufacturing tolerances vary widely between brands.

How does torque relate to pressure and sealing?
RV sewer systems are gravity-driven, not pressurized. Waste flows downhill from your tanks to the dump station inlet. No pump pushes it. This is a critical distinction because it changes what torque actually needs to accomplish.
You are not tightening a fitting to resist fluid pressure. You are compressing a rubber gasket so it conforms to the mating surface and blocks any path for liquid to escape. Seal effectiveness depends on gasket conformability, not on how hard you twist. A gasket that is crushed or torn by excess torque will leak just as badly as one that was never compressed at all.
This is why experienced RVers focus on feel rather than force. The fitting should turn smoothly, stop with a firm resistance, and hold without wobbling. If you feel the plastic start to flex or hear a creak, you have gone too far.
Here are the key risks on both ends of the torque range:
- Under-torqued fittings: Gasket stays flat, liquid finds a gap, and you get a slow drip or a full leak at the connection point.
- Over-torqued fittings: Gasket deforms permanently, threads strip, or the fitting body cracks. Replacement is the only fix.
- Correct torque: Gasket compresses evenly, fitting holds under a light tug, and no liquid escapes during a dump.
Pro Tip: After connecting, give the hose a gentle pull. If it slides off under light pull, the fitting was not properly seated. Reconnect before opening the tank valve.
What are best practices for tightening RV sewer hose fittings?
Proper technique matters as much as the torque value itself. Follow these steps every time you connect your sewer hose to avoid leaks and fitting damage.
- Inspect the gasket first. Check the rubber ring inside the fitting for cracks, flat spots, or debris. A damaged gasket will not seal regardless of how well you tighten the fitting.
- Hand-tighten to the stop. Twist the fitting by hand until it stops moving. This seats the gasket without applying any damaging force.
- Add one firm extra twist. Standard practice is to hand-tighten, then add one firm additional turn for security. For bayonet fittings, push and turn until you feel the locking tabs engage.
- Test the connection. Pull the hose gently. A properly connected fitting stays put. If it moves, repeat the process.
- Use the right tool if needed. Metal tools crack plastic fittings. Use a strap wrench or a torque-grip handle if you need extra leverage. These tools grip without concentrating force on a single point.
- Secure the dump station end. The initial surge of waste can blow a loosely fitted hose end off the ground inlet. Place a weight or brick against the hose elbow at the dump station before opening your tank valve.
- Check both ends. Most RVers focus on the RV outlet connection and forget the dump station inlet. Both ends need to be seated and stable.
Pro Tip: Practice connecting and disconnecting your sewer hose at home before your first trip. Doing it in your driveway with no pressure removes the stress of figuring it out at a busy dump station.
Avoiding common sewer support mistakes during setup also reduces the chance of a fitting working loose mid-dump. A hose that sags or kinks puts lateral stress on the fittings, which can loosen a connection that was properly torqued at the start.
How to maintain your RV sewer hose for long-term performance
A well-maintained sewer hose holds its connections better and lasts significantly longer than one that is ignored between trips. Maintenance takes less than five minutes and prevents the kind of failures that ruin a camping weekend.
- Use silicone-based lubricant on gaskets. Petroleum-based products degrade rubber O-rings. Silicone-based plumber’s grease preserves gasket integrity and makes repeated connections easier without causing damage.
- Inspect seals before every trip. Look for cracks, flat spots, or hardening in the rubber gaskets. Replace any gasket that does not look fully round and pliable.
- Rinse and dry the hose after each use. Residue left inside the hose degrades the material over time. A quick rinse and dry storage prevents odors and material breakdown.
- Store the hose in a dedicated tube or bag. Accordion-style hose sections crack when stored bent or compressed under other gear. A rigid storage tube keeps the hose straight and protected.
- Use a hose support to maintain proper slope. A sewer hose support keeps the hose elevated at a consistent downward angle from the RV to the dump inlet. This prevents pooling inside the hose, which adds weight and stresses the fittings.
- Cover the hose when not in active use. A hose cover protects the hose from UV damage, bird pecks, and rodent chewing, all of which cause pinhole leaks that are hard to spot until you have a mess.
Silicone lubricant does double duty. It protects the gasket material and makes the fitting easier to seat correctly, which means you are less likely to over-torque out of frustration with a stiff connection.
Key Takeaways
RV sewer hose torque is about compressing a gasket correctly, not applying maximum force. The right technique and the right tools matter more than hitting an exact ft-lb number.
| Point | Details |
|---|---|
| Torque is about sealing, not pressure | RV sewer systems are gravity-driven; torque compresses gaskets to block leaks, not resist fluid pressure. |
| Know your fitting type | Threaded fittings need 10–15 ft-lbs; bayonet fittings need 5–10 ft-lbs to avoid cracking or stripping. |
| Count turns over guessing force | For plastic NPT fittings, 3 to 4.5 turns past hand-tight is more reliable than estimating torque. |
| Avoid metal tools on plastic fittings | Use strap wrenches or torque-grip handles to add leverage without cracking the fitting body. |
| Secure the dump station end | A weight or brick against the hose elbow prevents blowouts from the initial waste surge. |
What I have learned from years of sewer hose connections
Here is something most guides skip: the dump station end causes more spills than the RV outlet end. Campers spend all their attention torquing the fitting at the rig and then drop the other end loosely into the ground inlet. The first rush of waste from a full black tank hits that loose end like a wave, and it pops right out.
I have seen it happen at campgrounds more times than I can count. The fix is simple and takes three seconds. Put something heavy against the elbow before you pull the valve. A brick, a rock, your boot. Anything that keeps it from moving.
On the tool question, I stopped using adjustable wrenches on plastic fittings years ago. A strap wrench gives you real grip and real control. You feel the resistance build, and you stop before the fitting flexes. With a metal wrench, you often do not notice you have gone too far until you hear the crack.
My honest advice: treat every connection like it is your first one. Inspect the gasket, hand-tighten, add one firm twist, pull-test, and secure both ends. That five-step habit takes under two minutes and eliminates almost every leak scenario I have encountered.
— Rvlevitator
Rvlevitator makes proper hose setup easier
Getting your torque right is only part of the equation. A hose that sags between the RV and the dump inlet puts constant stress on your fittings, which works against even a perfectly torqued connection.

Rvlevitator designs RV sewer hose supports that keep your hose elevated at the correct downward slope on any terrain, flat or uneven. The support system works without manual adjustments, protects the hose from ground contact, and sets up in seconds. Rvlevitator also offers hose cover solutions that shield your hose from UV damage, animals, and abrasion between uses. Every product comes with a money-back guarantee, so you can try it with zero risk.
FAQ
What is RV sewer hose torque?
RV sewer hose torque is the twisting force applied to sewer hose fittings to compress the rubber gasket and create a leak-free seal. It is not about maximum force. It is about controlled, consistent pressure that seats the gasket without cracking the fitting.
What torque specs apply to RV sewer hose fittings?
Threaded connections generally require 10–15 ft-lbs, while bayonet fittings need approximately 5–10 ft-lbs. No universal standard exists, so following manufacturer specs and using the count-the-turns method for plastic fittings is the most reliable approach.
Can I use a regular wrench to tighten my RV sewer hose?
Metal wrenches risk cracking plastic fittings. A strap wrench or torque-grip handle provides the leverage you need without concentrating force on a single point that could fracture the fitting body.
How do I know if my RV sewer hose fitting is tight enough?
Hand-tighten the fitting until it stops, add one firm extra twist, then pull the hose gently. If the fitting holds without moving, the connection is correct. If it slides off under light pull, it was not properly seated.
How often should I replace RV sewer hose gaskets?
Inspect gaskets before every trip and replace any that show cracking, flat spots, or hardening. Applying silicone-based lubricant after each use extends gasket life significantly by preventing the rubber from drying out between trips.
Leave a Reply